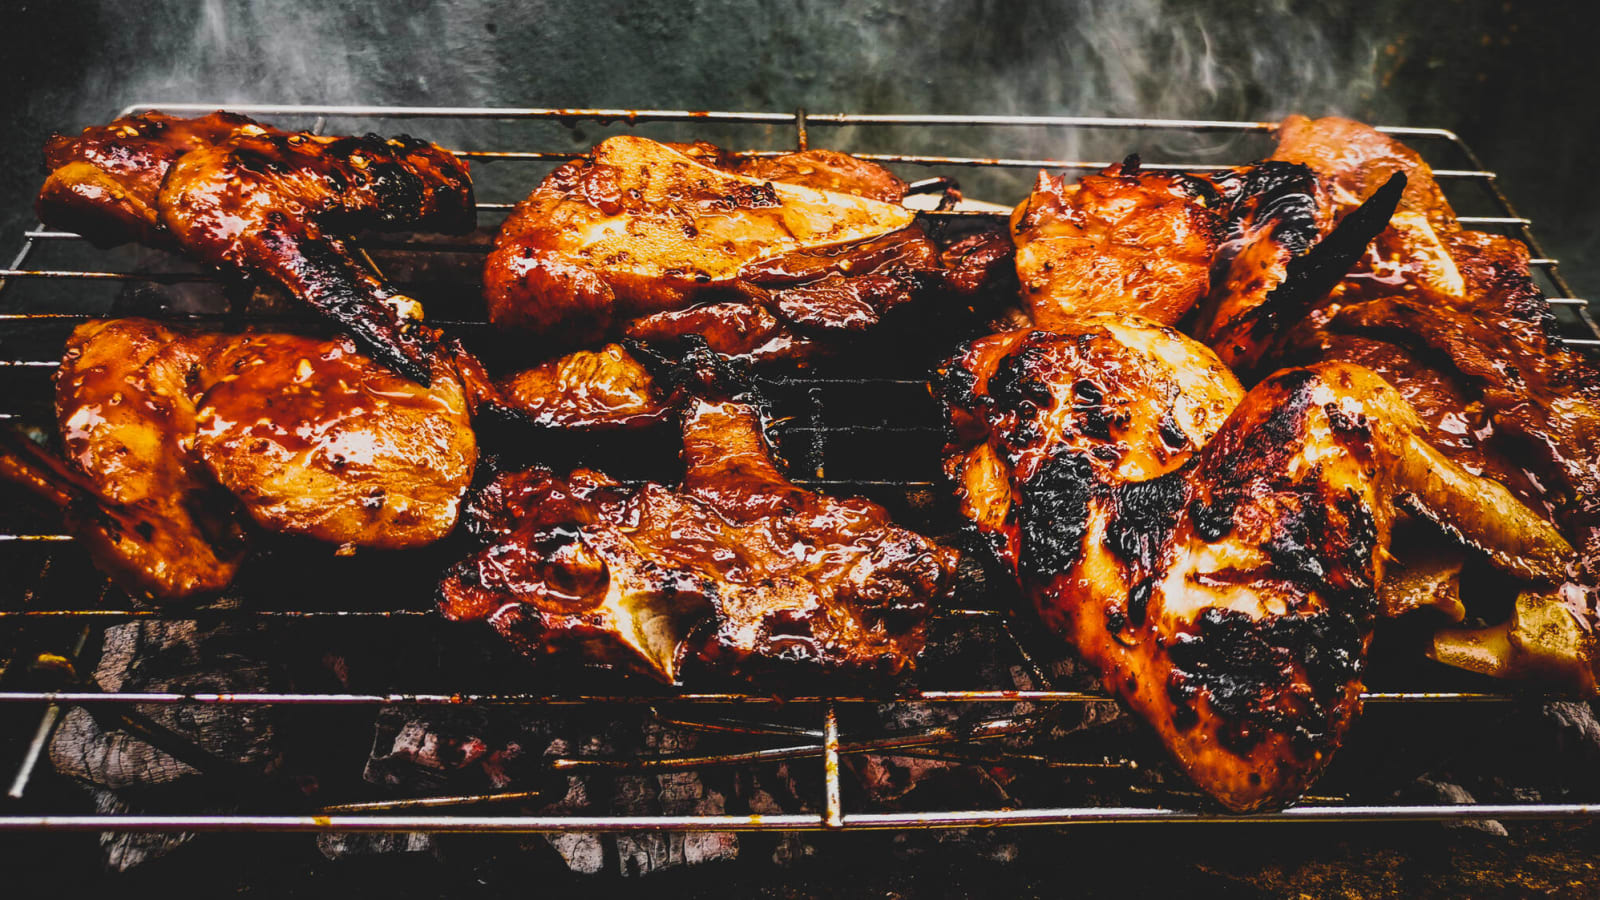
Grilled chicken is always a tasty meal, but some chefs shy away because the meat tends to dry out a bit. After all, grilling is a dry cooking method, so this is somewhat expected. However, you don’t have to settle for sub-par poultry. Instead, try these 20 tips and tricks to keep your chicken moist on the grill.
1 of 20
Don’t fear the heater
Douglas Sacha / Getty Images
Don’t make the mistake of keeping your grill on low because you’re worried about dried-out meat. Instead, be sure to keep your grill on medium to high heat, or about 300 degrees Fahrenheit. If you’re not into the whole numerical thing or don’t have a grill with exact temps, try the three-second rule. If you can hold your hand about four inches above the grill and count off three full seconds, it’s too low. If you can only put your hand over it for one second, it’s too high.
2 of 20
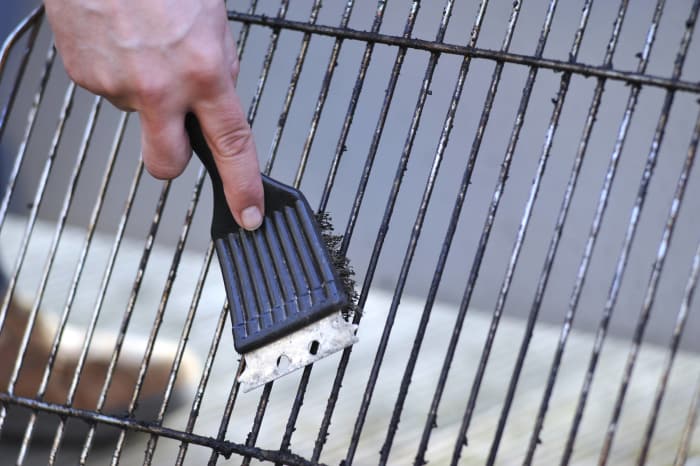
A clean grill is a happy grill
Wakila / Getty Images
When heating up your grill, be sure to scrub its grate with a hard wire brush. This should be a no-brainer in terms of cleanliness, but it’s especially crucial when you’re concerned about cooking your food perfectly. If the grill isn’t clean, your meat could stick to it, and your whole meal could go up in smoke - both figuratively and literally. Don’t have a wire brush handy? Crumble up a piece of aluminum foil into a ball, hold it with a pair of tongs, and use that. Don’t have tongs? Now you’re in trouble.
3 of 20
Greased lightning!
Douglas Sacha / Getty Images
Now that your grill is clean, let’s dirty it up again by adding some oil. Roll a paper towel into a ball, dip it in vegetable or olive oil, and grab it with a pair of tongs. (We told you they were important... and we haven’t even started cooking yet.) Then brush the oil-soaked ball over the bars of the grate. Not only will this help avoid stickage (which is apparently a word), but it will help you get some killer grill marks without scorching your meat. Read more about proper grill greasing from Char-Broil here.
Joe Gough / Shutterstock.com
Bargain prices can be tempting, but don’t cheap out on your chicken. Higher-quality meat will cook better on the grill, making it well worth the extra money. We’re not saying you need some sort of top-shelf organic chicken that comes with its own backstory (any “Portlandia” fans out there?) but for the sake of flavor and moisture, avoid budget breasts.
Evgeniy Kolosov / Shutterstock.com
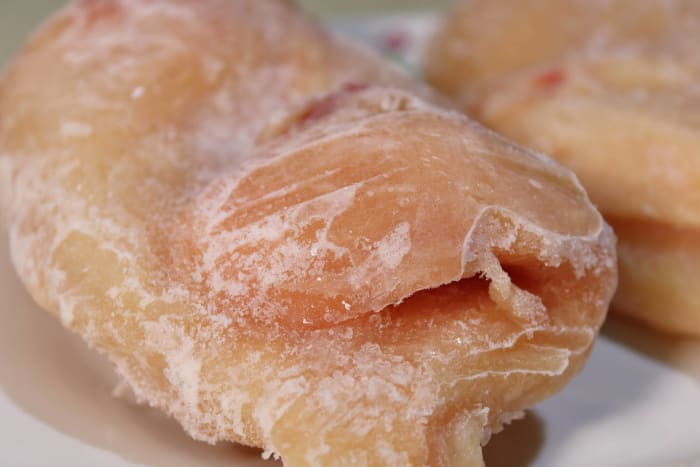
You might think frozen chicken has extra moisture locked into it, but resist the urge to grill a frozen or semi-frozen breast. If not properly and completely thawed beforehand, the chicken won’t cook evenly and some parts could dry out by the time other parts reach the appropriate temperature. (Or, even worse, some of it could end up undercooked.)
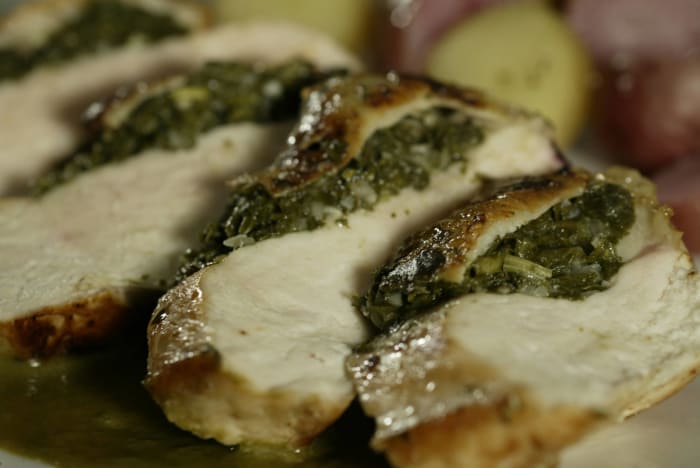
Bryan Chan/Los Angeles Times via Getty Images
One way to stop a thicker chicken breast from drying out is to stuff it, which not only adds extra moisture to the interior, but it also adds some extra flavor! Need some inspiration? Feel free to start out simple with this cheddar-stuffed recipe from Betty Crocker or spice things up with this recipe from Grilling 24x7, which includes cheese, bacon, jalapeños, and barbecue sauce.
Nataliia Maksymenko / Shutterstock.com
It doesn’t matter whether you prefer larger or smaller pieces of chicken, but for the sake of cooking quality, just use similarly sized cuts. If you mix and match, some pieces will cook much faster than others and you’ll constantly be checking temperatures or trying to guess when each piece is adequately heated. When in doubt, break out the kitchen scale!
8 of 20
Go big or go home
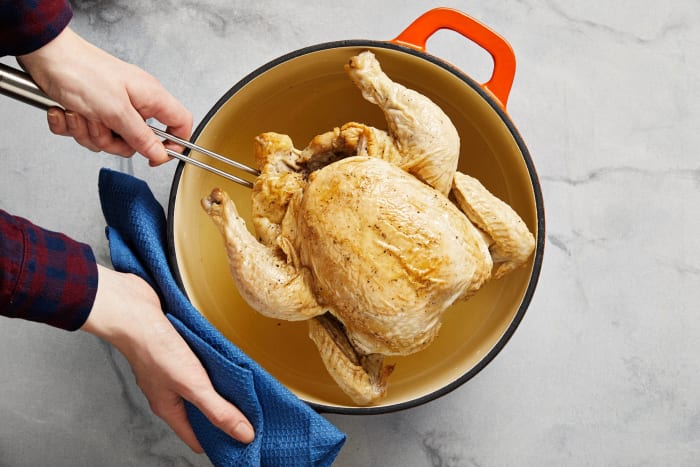
Chang / Getty Images
If you’re especially concerned about the breast meat drying out, opt for a whole roast chicken instead. Not only does the shape essentially create a roasting rack that protects the bottom of the breast from the drying heat of the grill, but you can add some herbs and seasonings under the skin so it bastes as it cooks. For more info, check out this recipe for cilantro lemon grilled chicken from the good folks at Weber.
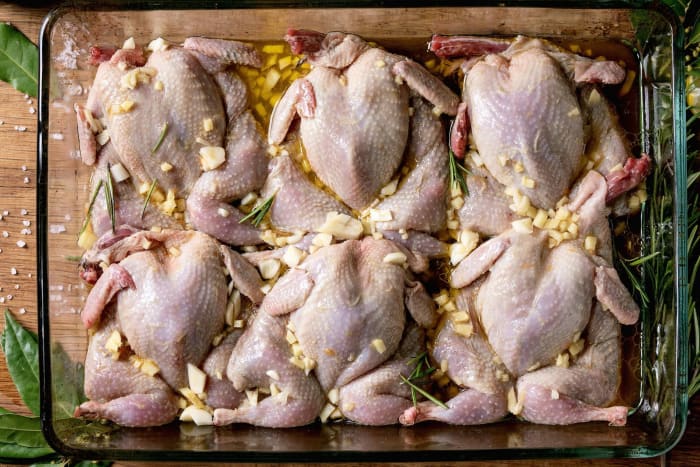
Natasha Breen/REDA&CO/Universal Images Group via Getty Images)
Like the idea of cooking a whole chicken but worried about uneven heating? No worries, there is a solution. Try butterflying your chicken first by slicing down one or both sides of the backbone, opening the whole thing, and flipping it over flat. If you’d like some more detailed instructions (with more photos), head on over to Tasty Yummies.
10 of 20
Make time for brine
Iain Bagwell / Getty Images
Without getting into all the science behind it (we’re not really the lab-coat types), soaking your chicken in brine can add about 10 percent more moisture to the inside, while also soaking up the salt and seasonings in the brine. If you can spare the time, aim to brine your chicken for about four to six hours. Even if you can only spare an hour, go for it, and you’ll still notice the difference in taste. A brine can be as simple as water and salt, but usually, a little sweetness is added as well. This simple and satisfying brine recipe from All Recipes utilizes soy sauce, but if you’re feeling especially festive, try this one from Betty Crocker that invites beer to the party!
11 of 20
Short on space? Salt!
aleksandr talancev / Shutterstock.com
If you have time to brine but no space for a brining container in the fridge, consider salting (also known as “dry-brining”) instead. After patting the chicken dry, generously coat it in salt (don’t worry, much of the salt will cook off anyway), and refrigerate them uncovered for at least 30 minutes. Pat them again before cooking, and you’ll be good to go!
12 of 20
Dare to add some southern flair
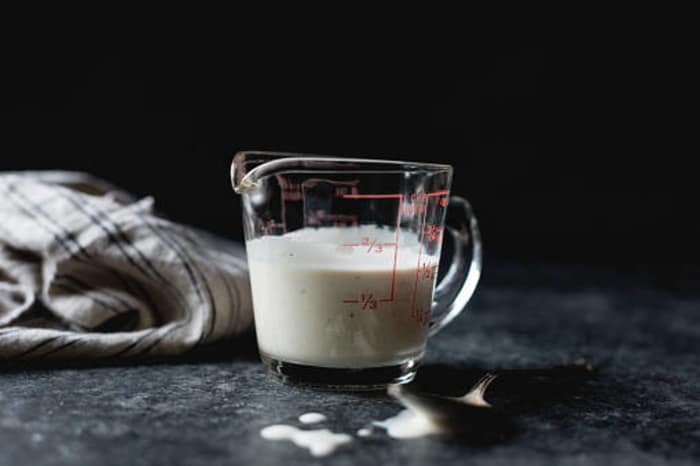
The Picture Pantry / Getty Images
If brine isn’t your thing, think Southern and use buttermilk instead. Same goal, different flavor. Like the brine, you should also aim to marinate your chicken in buttermilk for a few hours. For more details and grilling instructions, check out this Martha Stewart recipe for grilled buttermilk chicken.
Lisa Cherkasky for The Washington Post via Getty Images
Another trick used by some chefs is to poach the chicken before grilling it. The reason it keeps the meat moist is similar to the brine or marinade techniques, except in this case, you’re actually heating it while you marinate it. The idea might sound far out to some, but it’s not so rare in other cultures. To help get you started, head over to the New York Times for this Filipino chicken adobo recipe – a meal so nice that you cook it twice. Alternately, you can also simply poach it in chicken stock, or a mixture of stock and buttermilk.
Douglas Sacha / Getty Images
Sauces and glazes don’t just add an extra flavor boost to your chicken, they can actually help keep your meat from drying out by sealing in the flavors and moisture. Straight-up barbecue sauce is always a solid option, but feel free to mix it up with something else, such as a homemade salsa like the one in this recipe from Taste of Home.
15 of 20
Don’t get sauced too soon
Cooking Classy
Even if you use a marinade or glaze ahead of time, you’ll still want to brush your meats once they’re on the grill. But don’t start glazing right away or you’ll scorch the sugar. As this Cooking Classy recipe for grilled chicken with honey mustard advises, you should let the chicken cook on the grill for about four minutes, glaze, flip, brush, and cook for another four or five minutes. Be sure to save a little extra sauce, as they advise brushing each side again when the chicken comes off the grill.
16 of 20
Prepare a paillard
Karolína Hrdlicková / EyeEm / Getty Images
Don’t get spooked just because we’re using fancy words like “paillard.” In reality, this just means you should pound your chicken breast into a thin, flat cutlet. By making it uniform in thickness (or thinness), you’ll avoid having the chicken cook unevenly, and by making it flat, you’ll ensure that it can cook all the way through without staying on the grill for too long. But don’t just attack it with a hammer-like a kitchen version of whack-a-mole. Instead, follow these prep instructions via Serious Eats, and voilà... you’ll have moist, evenly-cooked chicken that doesn’t even require brining or marinating - which is helpful if you’re short on time.
KirbyIng / Getty Images
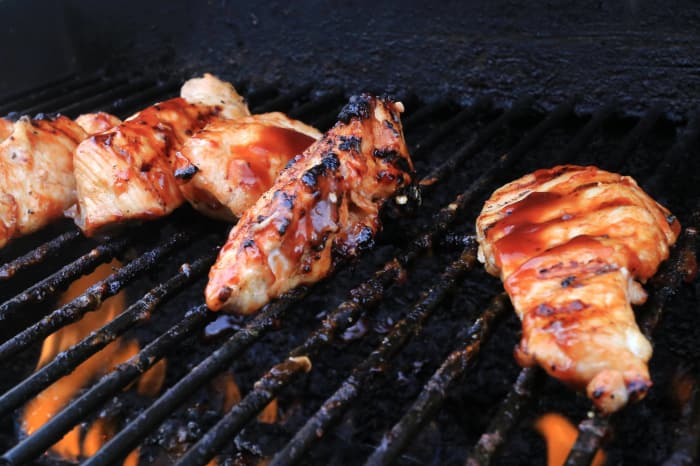
If a whole chicken or large pieces are too much for you to handle (or consume), slice the chicken into smaller, thinner pieces. Then thread these onto skewers and throw them directly on the grill. Each stick will only spend a maximum of four to six minutes over the heat, so the chances of them drying out is minimal. Plus, you can always marinate them ahead of time for added moisture. If you’re feeling fancy, try this recipe for grilled chicken satay with spicy peanut sauce from Skinnytaste.
18 of 20
Put the pressure on
Deb Lindsey for The Washington Post via Getty Images
Similar to how some people grill steaks and (sometimes) burgers, you can use a heavy object to compact your chicken, giving it a better texture and creating those beautiful grill marks. More importantly, it also hastens cooking and blocks the escape of moisture. You could invest in an actual grill press for this one, or, alternately, use a cast-iron skillet, foil-covered brick, or old-timey iron (as pictured). For some extra tips on brick-cooking and a recipe, consult our friends over at Bon Appetit.
Foodandwinephotography / Getty Images
As some of the recipes mention, you may want to use a thermometer when grilling your chicken. It will help ensure that you cook the meat thoroughly enough and not a moment more, and you’ll also feel like some kind of weird chicken doctor. (A bad chicken doctor, since all your patients end up dead.) Ideally, you want an interior temperature of 165 degrees Fahrenheit, and you should be sure to insert your thermometer into the side of the chicken, not the top. Need help deciding on the right tool? Check out some of the top picks over at BestReviews.com.
20 of 20
Don’t forget to rest
AnastasiaKopa / Shutterstock.com
No, not you — the chicken! While it’s tempting to dig into chicken as soon as it comes off the grill, you’ll want to let the chicken rest before cutting into it (the same as you’d do for a steak or a burger…we hope!). Allowing the breast to cool down for a few minutes helps seal in the juices.


 +
+

