-

-


Follow Us
-

Last season, we dove into former Vancouver Canucks head coach Rick Tocchet’s systems, amid all the noise about the team buying into ‘Tocchet hockey’.
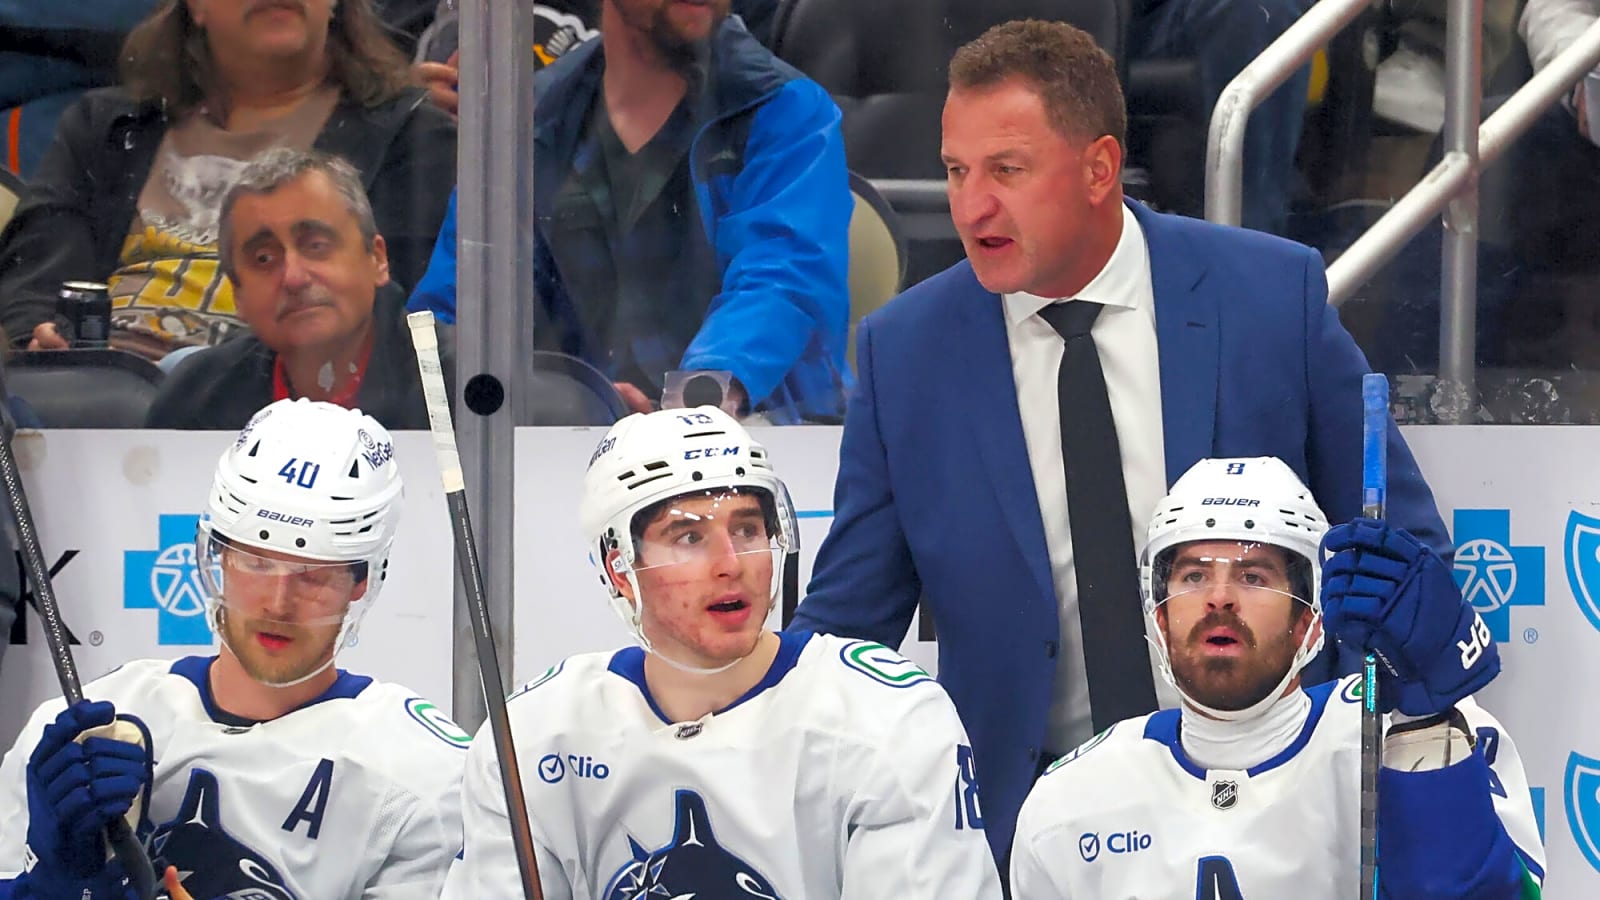
For the team’s sake, let’s hope this isn’t an annual piece where we dive into the newest Canucks head coach’s systems. But with Adam Foote taking over to start this year, we thought it’d be appropriate to examine and explain the new systems the Canucks bench boss has come up with through the first quarter of the season.
We will start in the defensive zone and make our way up ice from there.
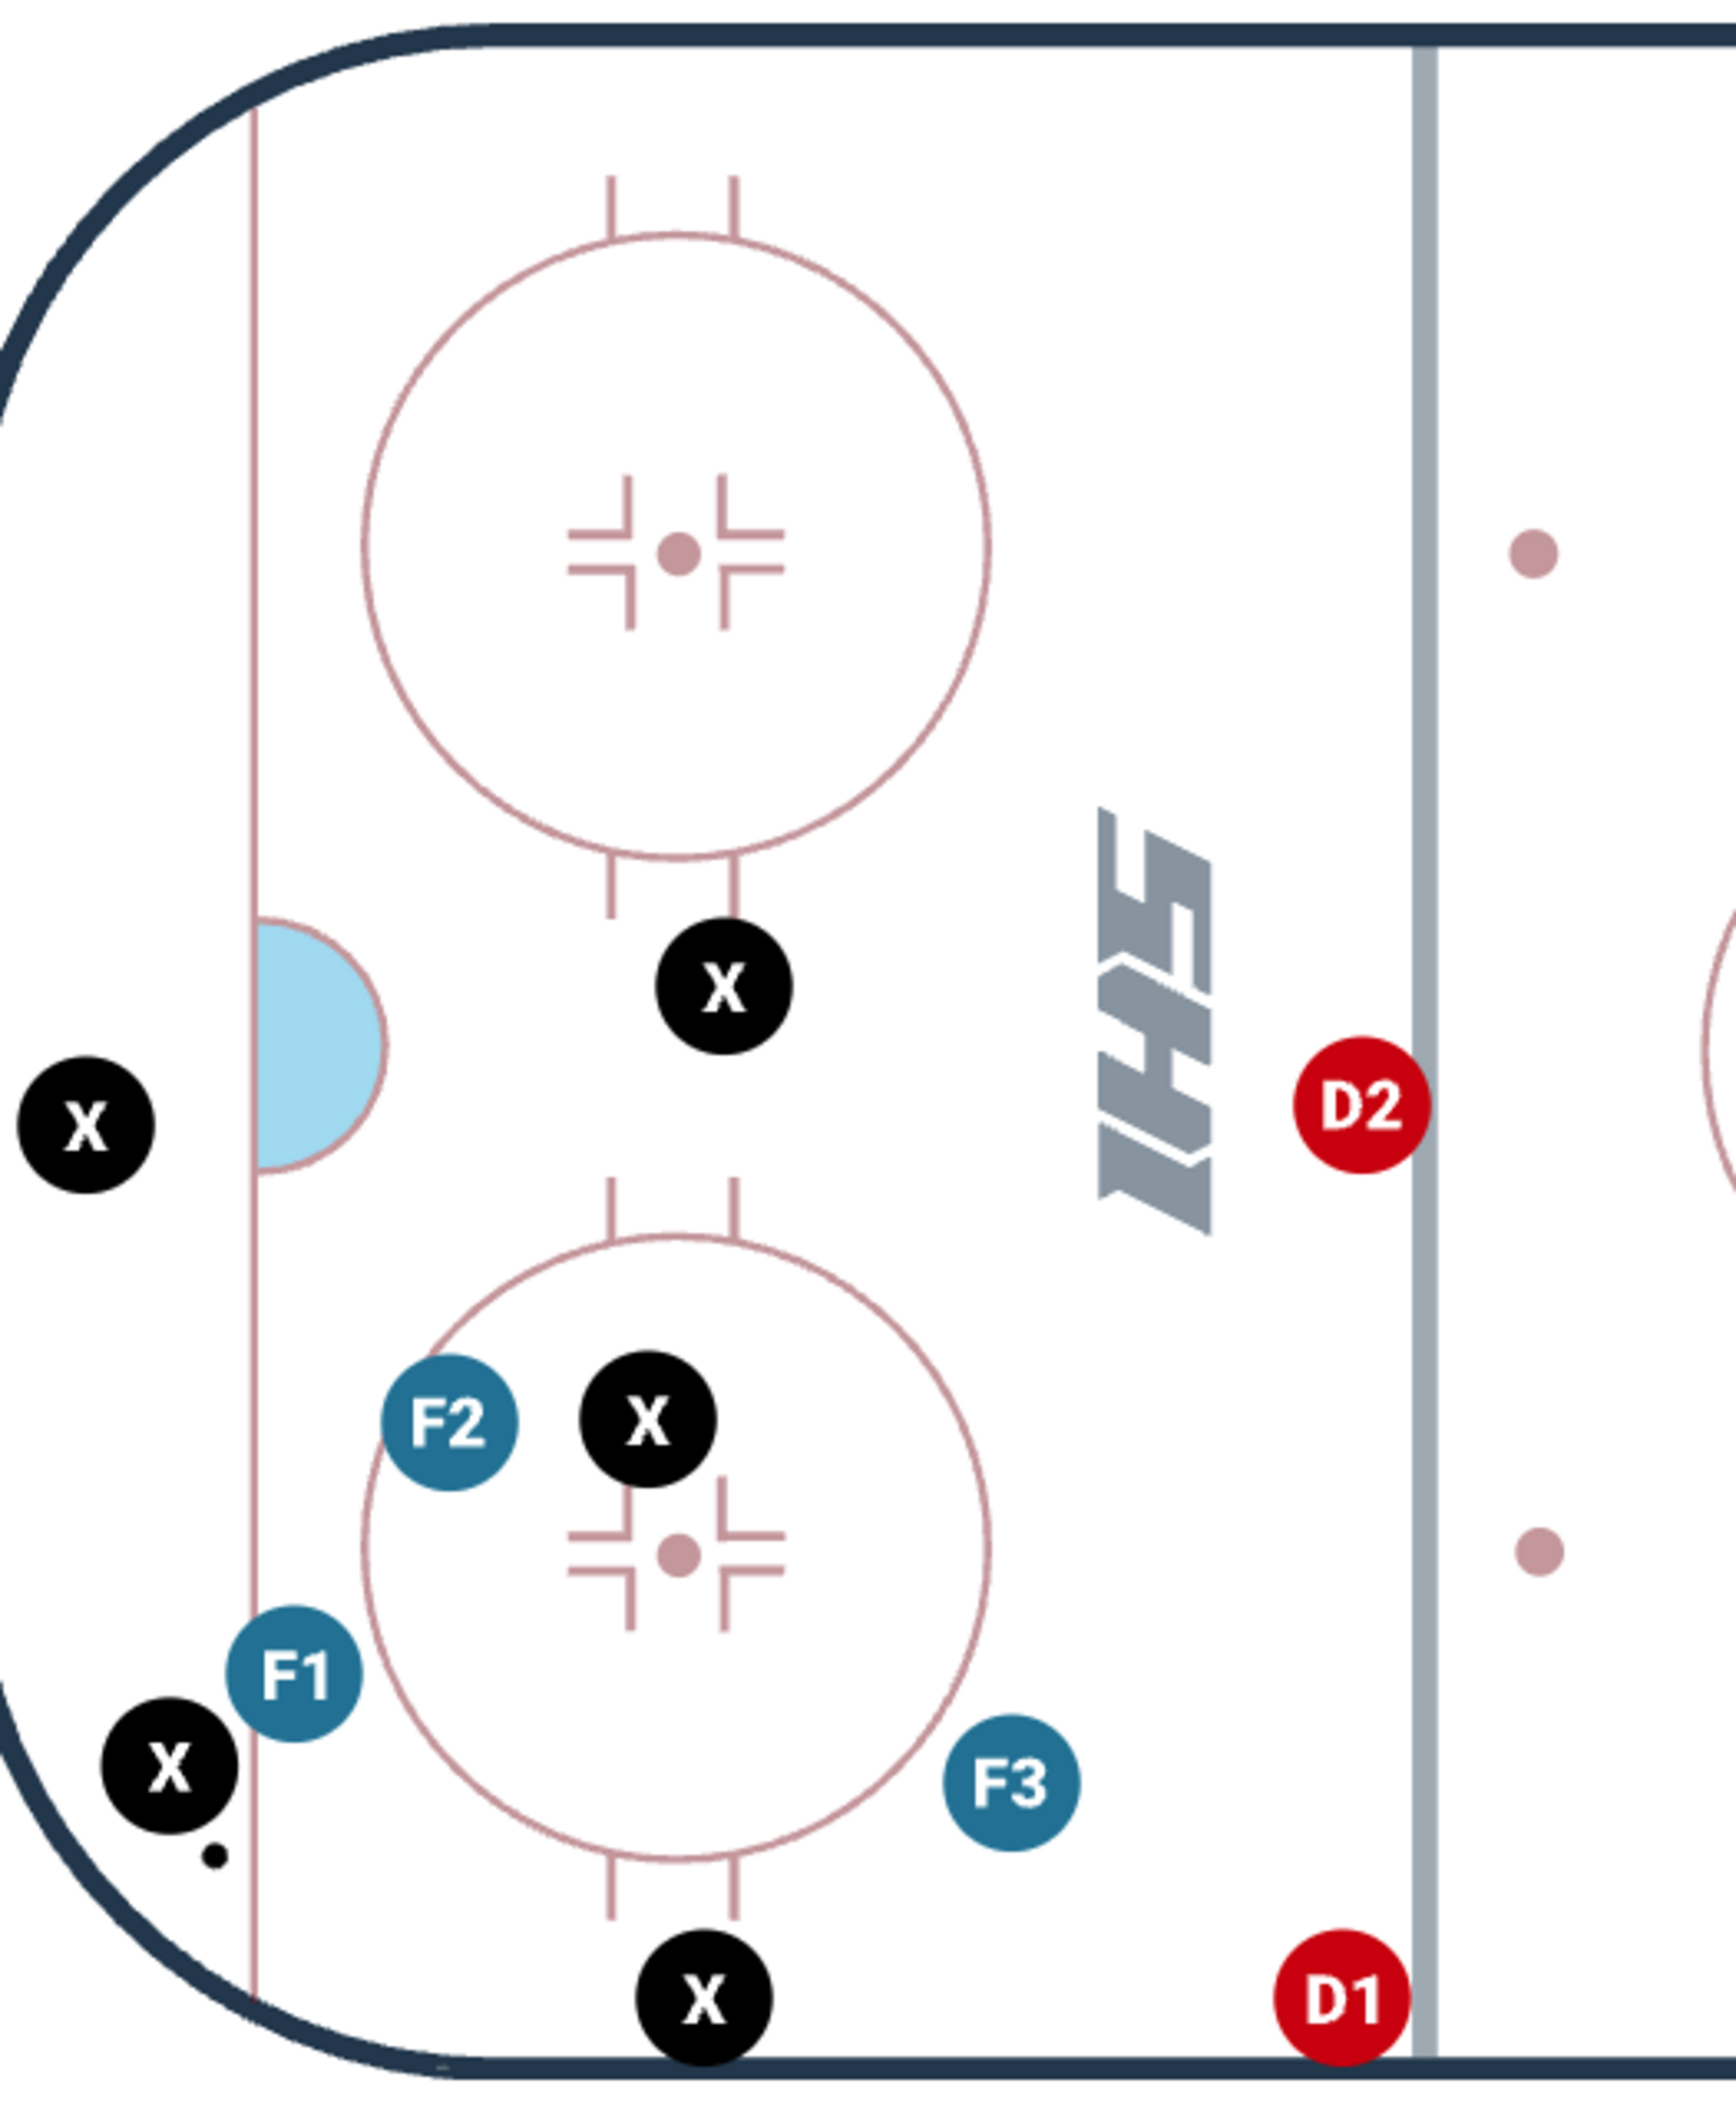
Defensive zone coverage
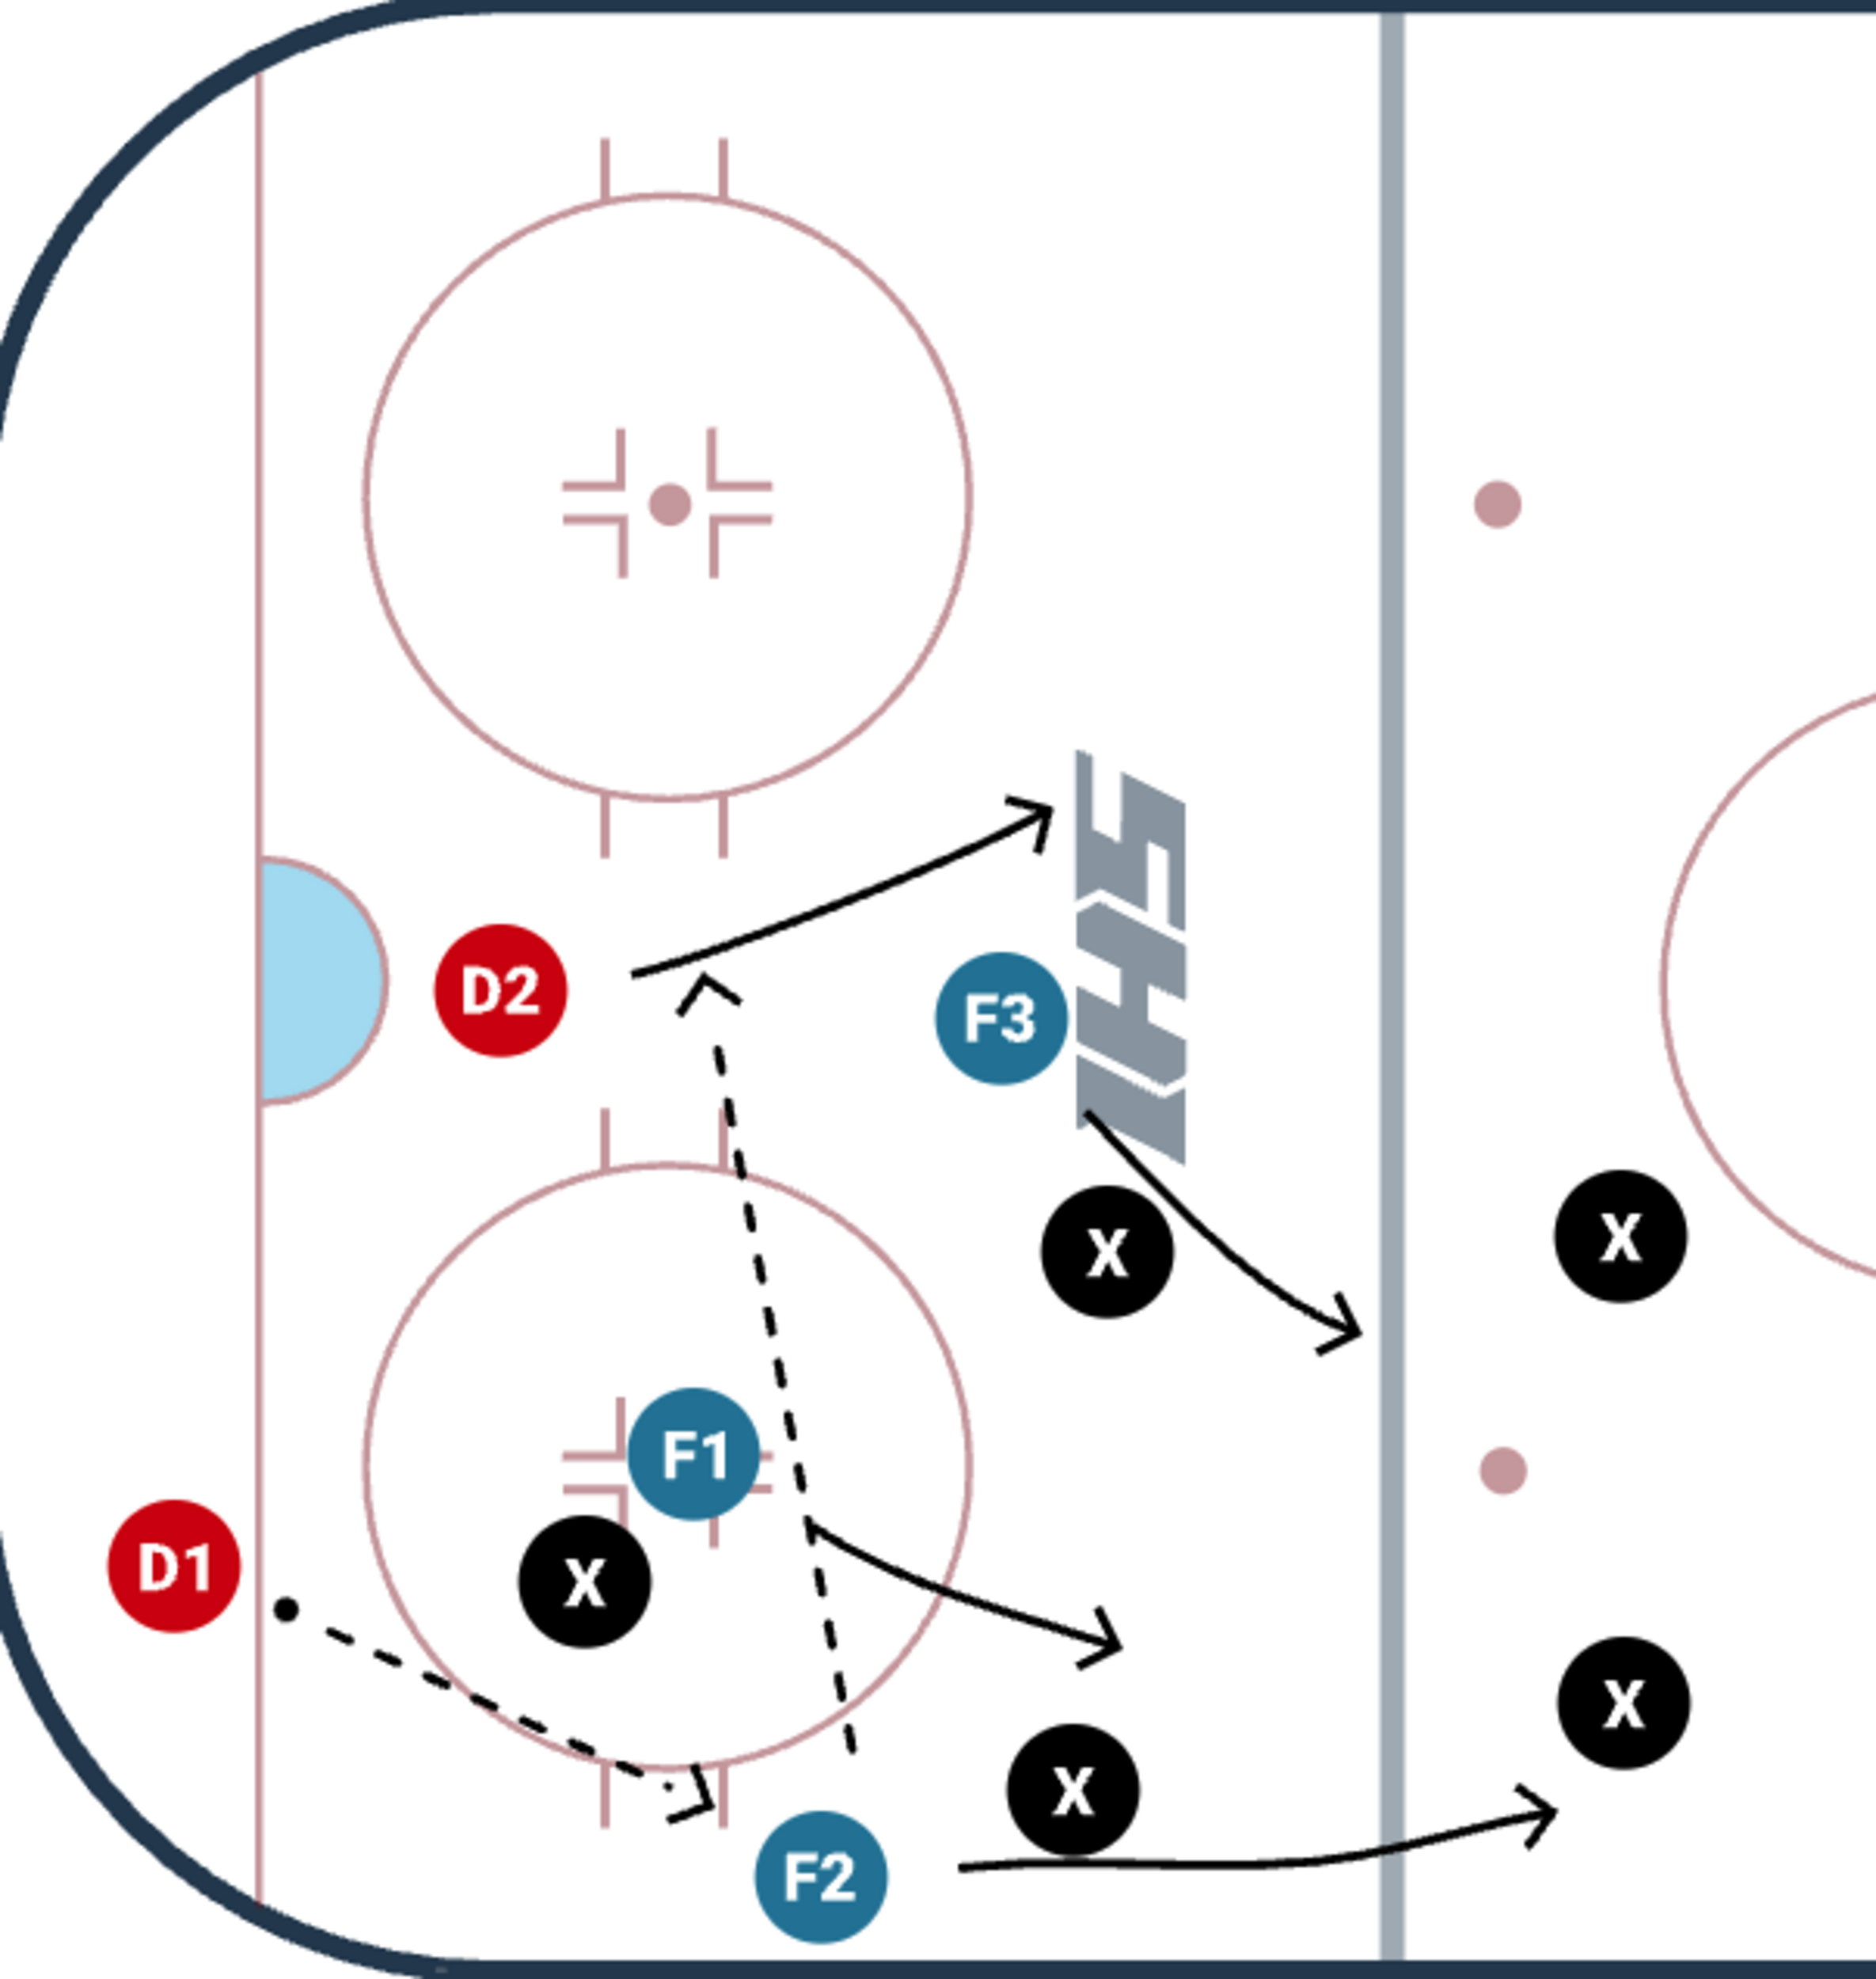
The Canucks’ defensive zone coverage has changed significantly this season, shifting from a fairly simple box-and-one style, focusing on taking away the middle of the ice. They’ve switched to a more man-on-man style of coverage. However, when the puck is below the hash marks, there is more support than in your typical man-on-man.
When the puck is in the corner, we see one of the Canucks defencemen go into pressure, with the first forward back (F1) providing low support, ready to jump in if the puck is moved up or down the boards. The weakside defenceman (D2) is net-front, taking away the option for a pass. The wingers play a bit higher (F2 & F3), so that if the puck is moved to the point, they can jump to pressure their man.
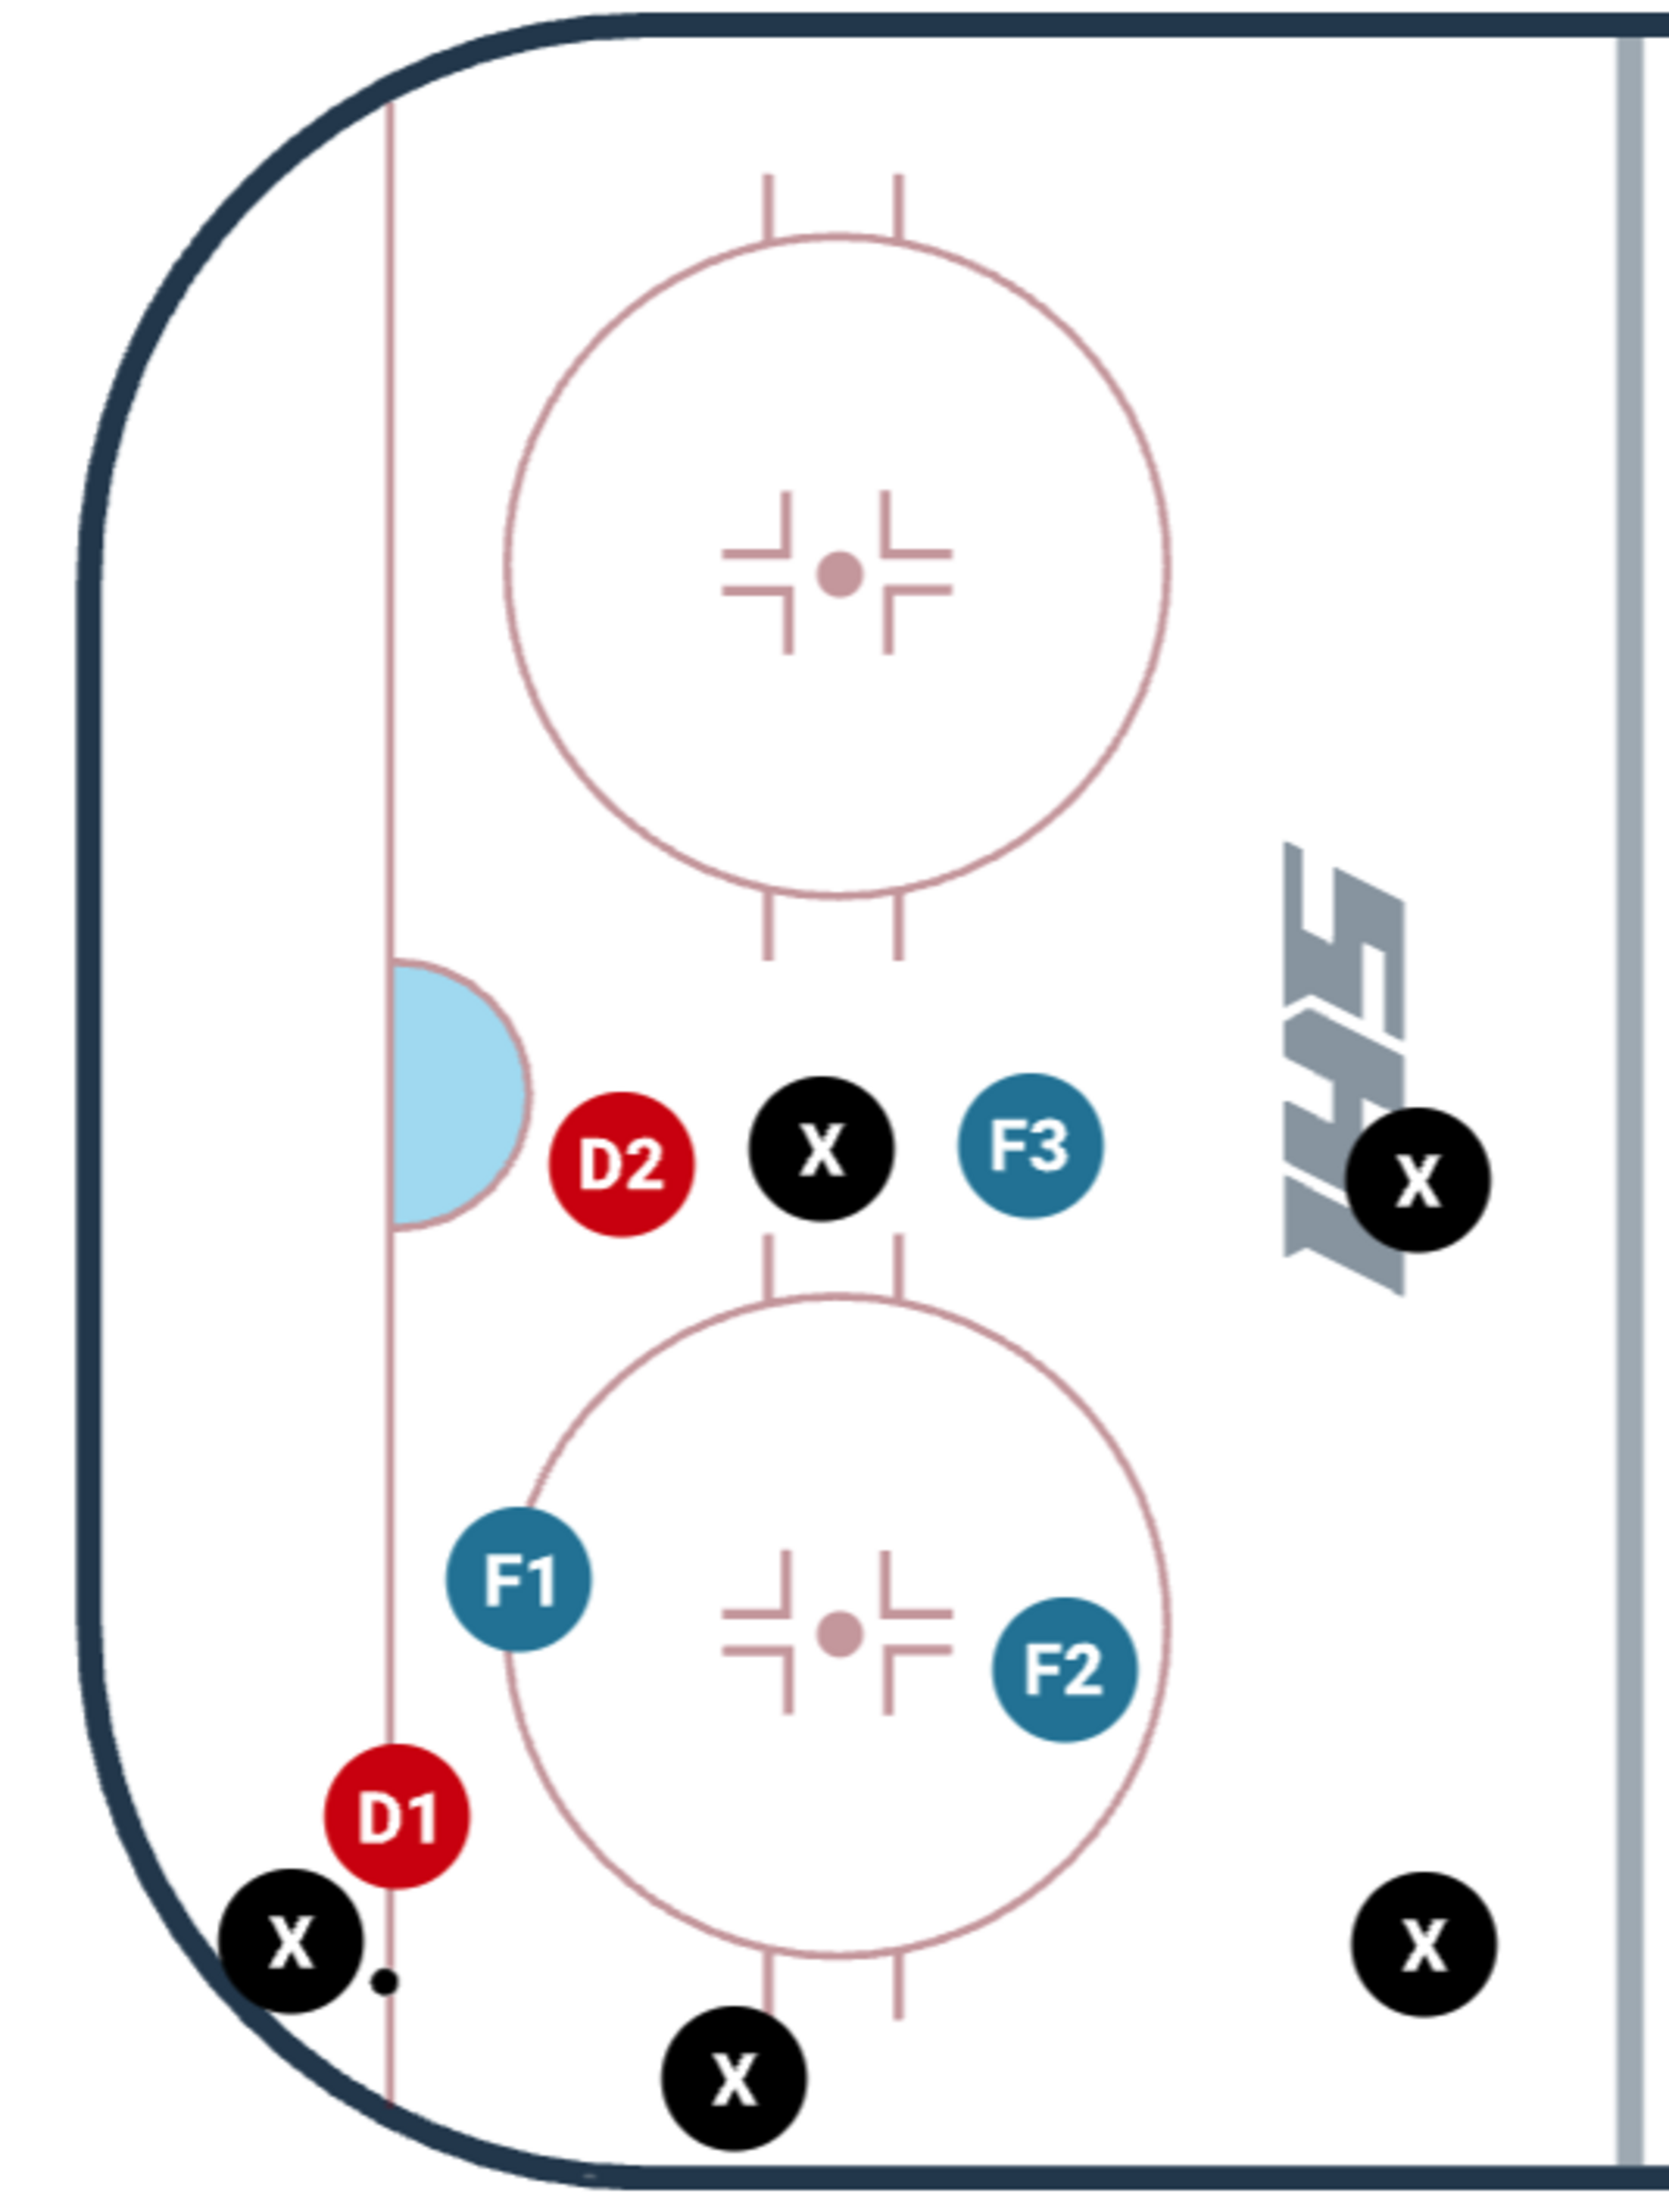
Once the puck is moved up the half wall, they switch into a more true man-on-man coverage. The low forward (F1) that was supporting the defenceman down low is the one to take the player now with the puck on the half wall, while the defenceman in the corner (D1) stays between the opponent’s forward and the net. The net-front defencemen (D2) should then tie up their man to eliminate the possibility of a tip on a shot or of being available to score on a rebound.
From this point, anytime the puck is moved anywhere above the hash marks, each player’s responsibility is to take another player, creating five different one-on-ones all over the ice.
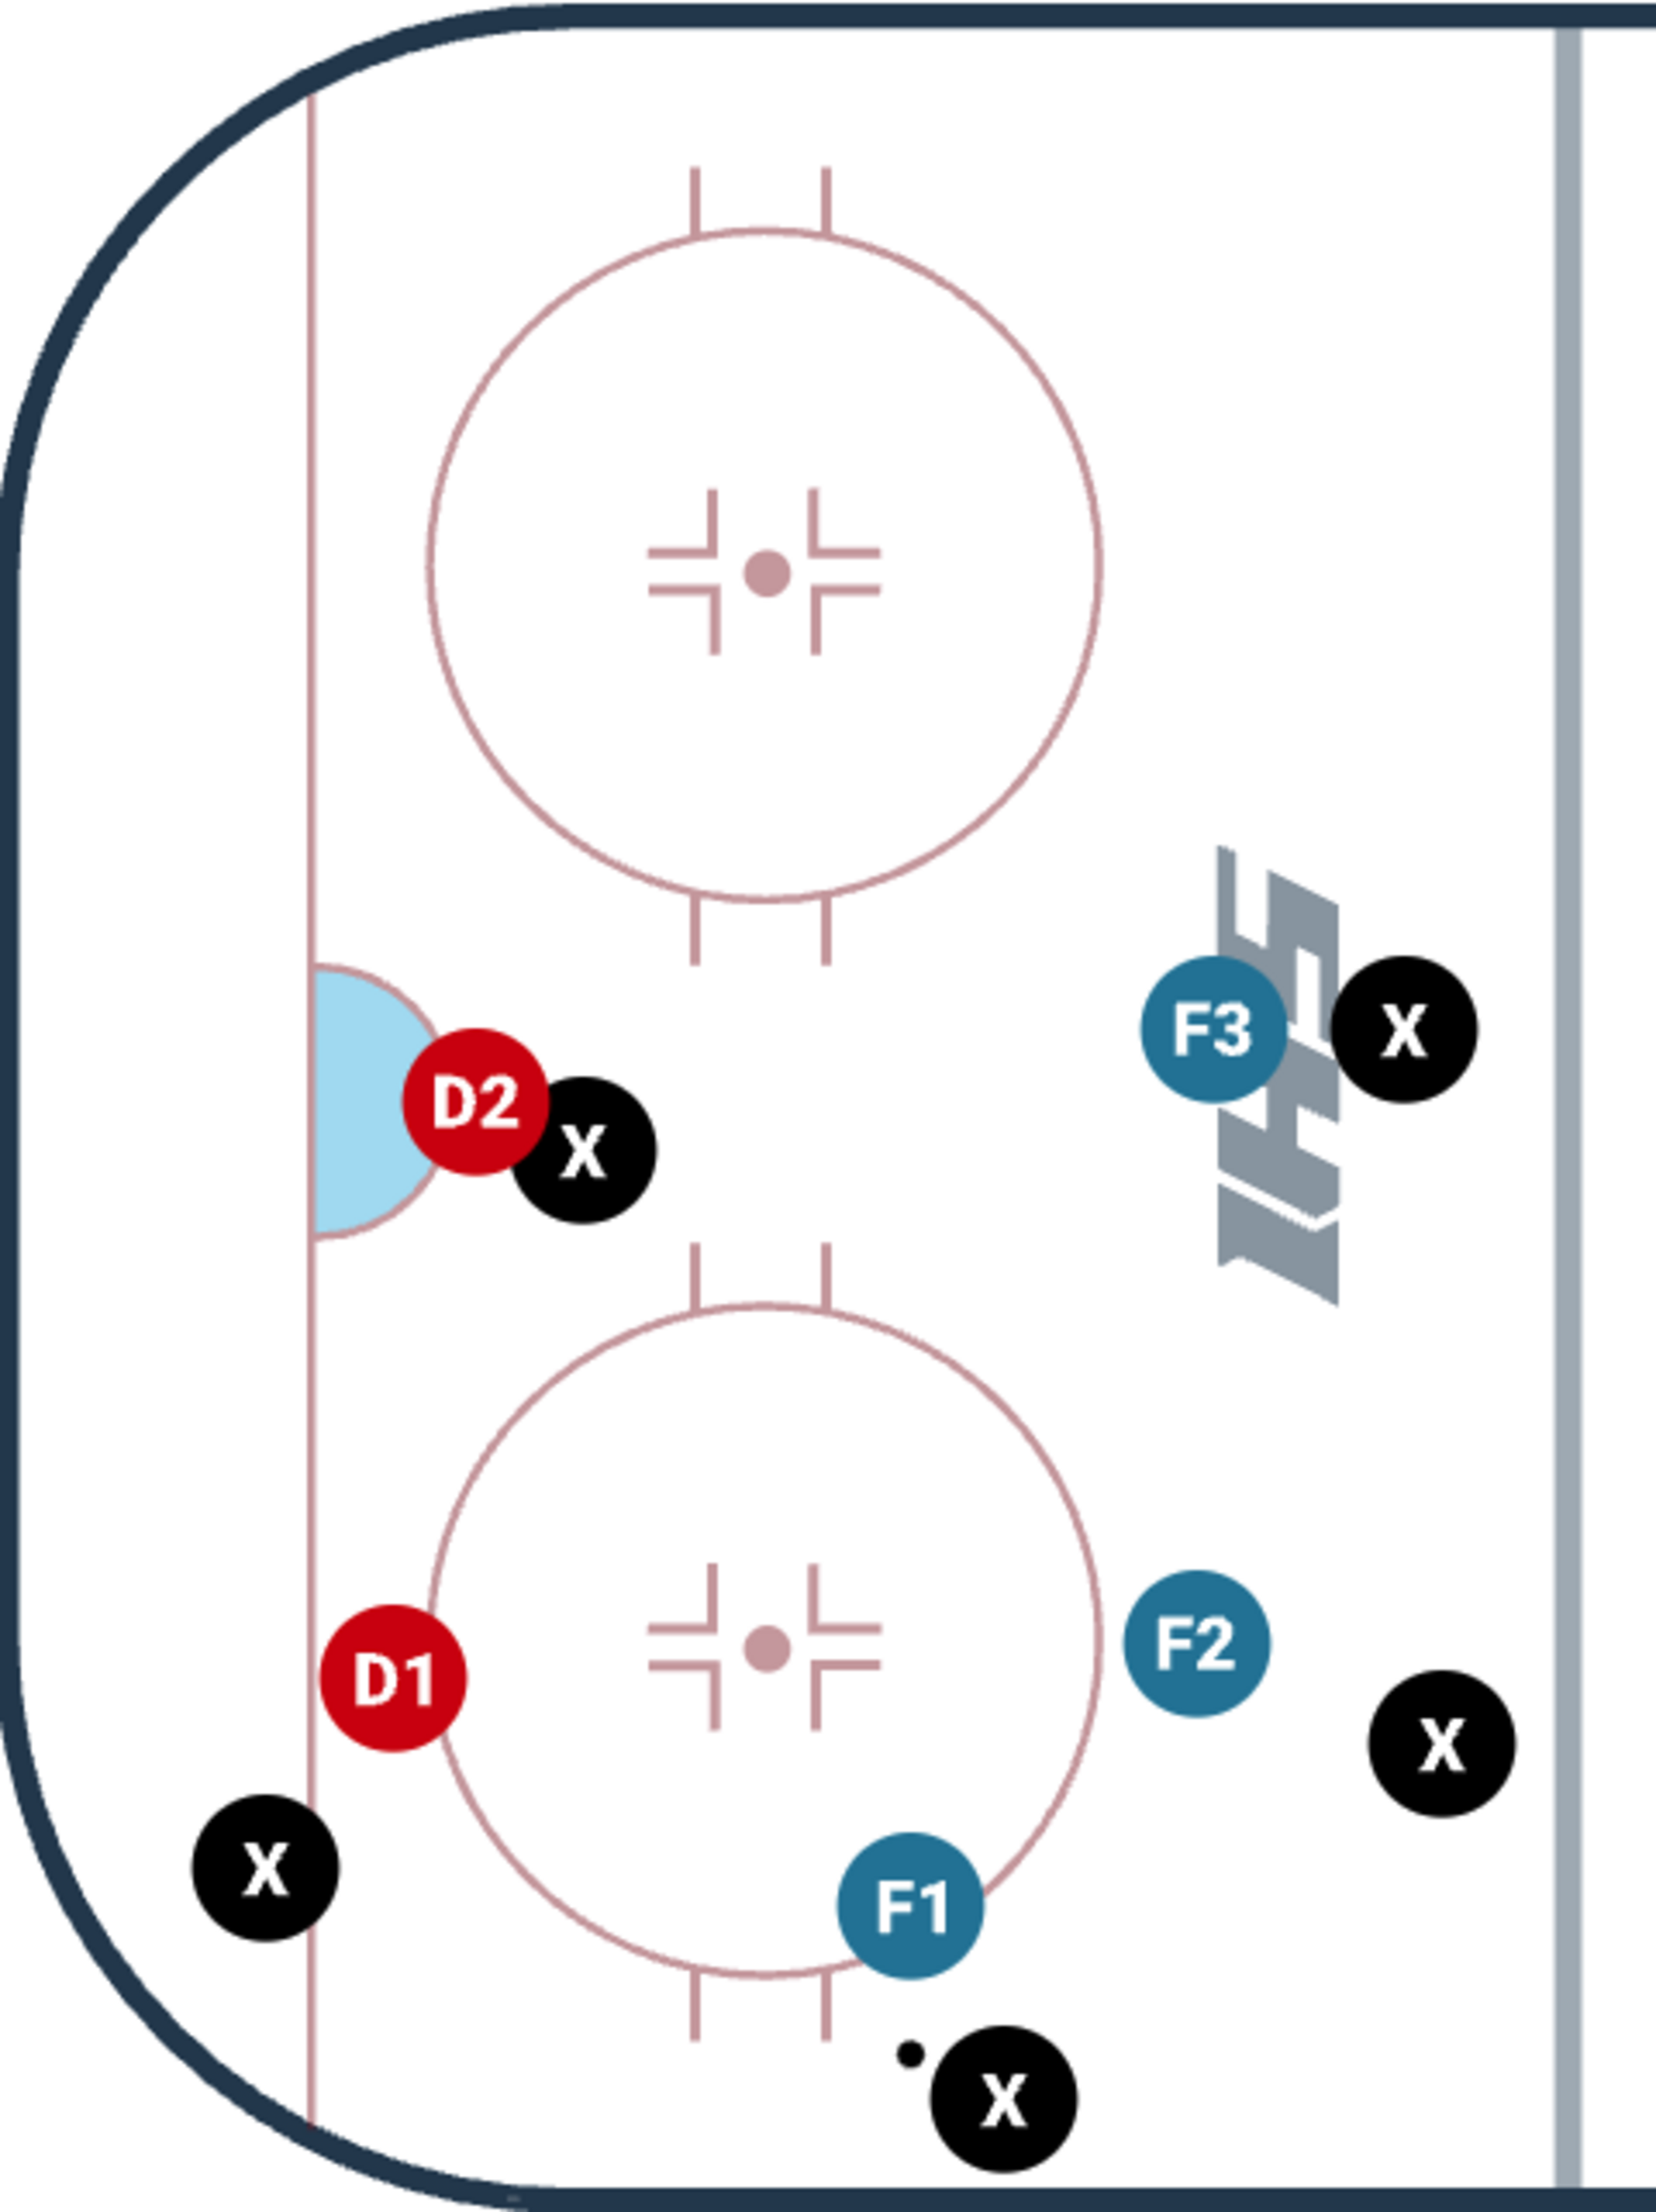
Where we see breakdowns happen here is if someone gets beaten or another Canuck leaves their man to try to support. Often, the opposing team will take advantage of this when we see the puck carrier bring the puck up the boards, move it to his defenceman, who starts bringing it into the middle of the ice, while the weakside defenceman sneaks down. The weakside winger (F3) for the Canucks, rather than sticking with his defenceman who’s sneaking down, helps pressure the defenceman in the middle of the ice.

Another example would be when the puck carrier brings the puck up the boards, the strong side winger (F2) will attempt to help pressure him, leaving the strong side defenceman for the other team open, giving him either a shooting lane or space to make another play, when the weak side winger (F3) comes into support.
Canucks Head Coach Adam Foote has talked about these breakdowns a bit, noting that players sometimes go out of their way to support when they’re not supposed to in this system.
It can be difficult for a player to break the habit of not supporting defensively because it is so much more common for teams to run defensive systems that provide much more support and don’t create these one-on-ones all over the ice. But when done correctly and with the right personnel, this system can be highly effective at shutting down teams.
Defensive zone & Neutral zone breakouts
Breaking out of the defensive zone is more about taking what you can get than anything else. But one thing the Canucks seem to do a fair bit is activate their defencemen off the breakout and involve them in the rush.
Often, the puck will be moved up to the winger (F2), and they will look for a pass back to the weakside defenceman (D2).
The puck is moved up to the winger (F2) on the boards, while the centreman (F1) swings through the middle as an option for a pass, while the weak side winger (F3) cuts across to the middle of the ice, and the weak side defenceman (D2) hangs back in the slot area. If the look is there, the Canucks like to move the puck to that weakside defenceman (D2) who will have tons of space to skate the puck into the neutral zone.
They do the same thing in the neutral zone, often looking to that weakside defenceman (D2) to take the pass and move the puck up ice with space.
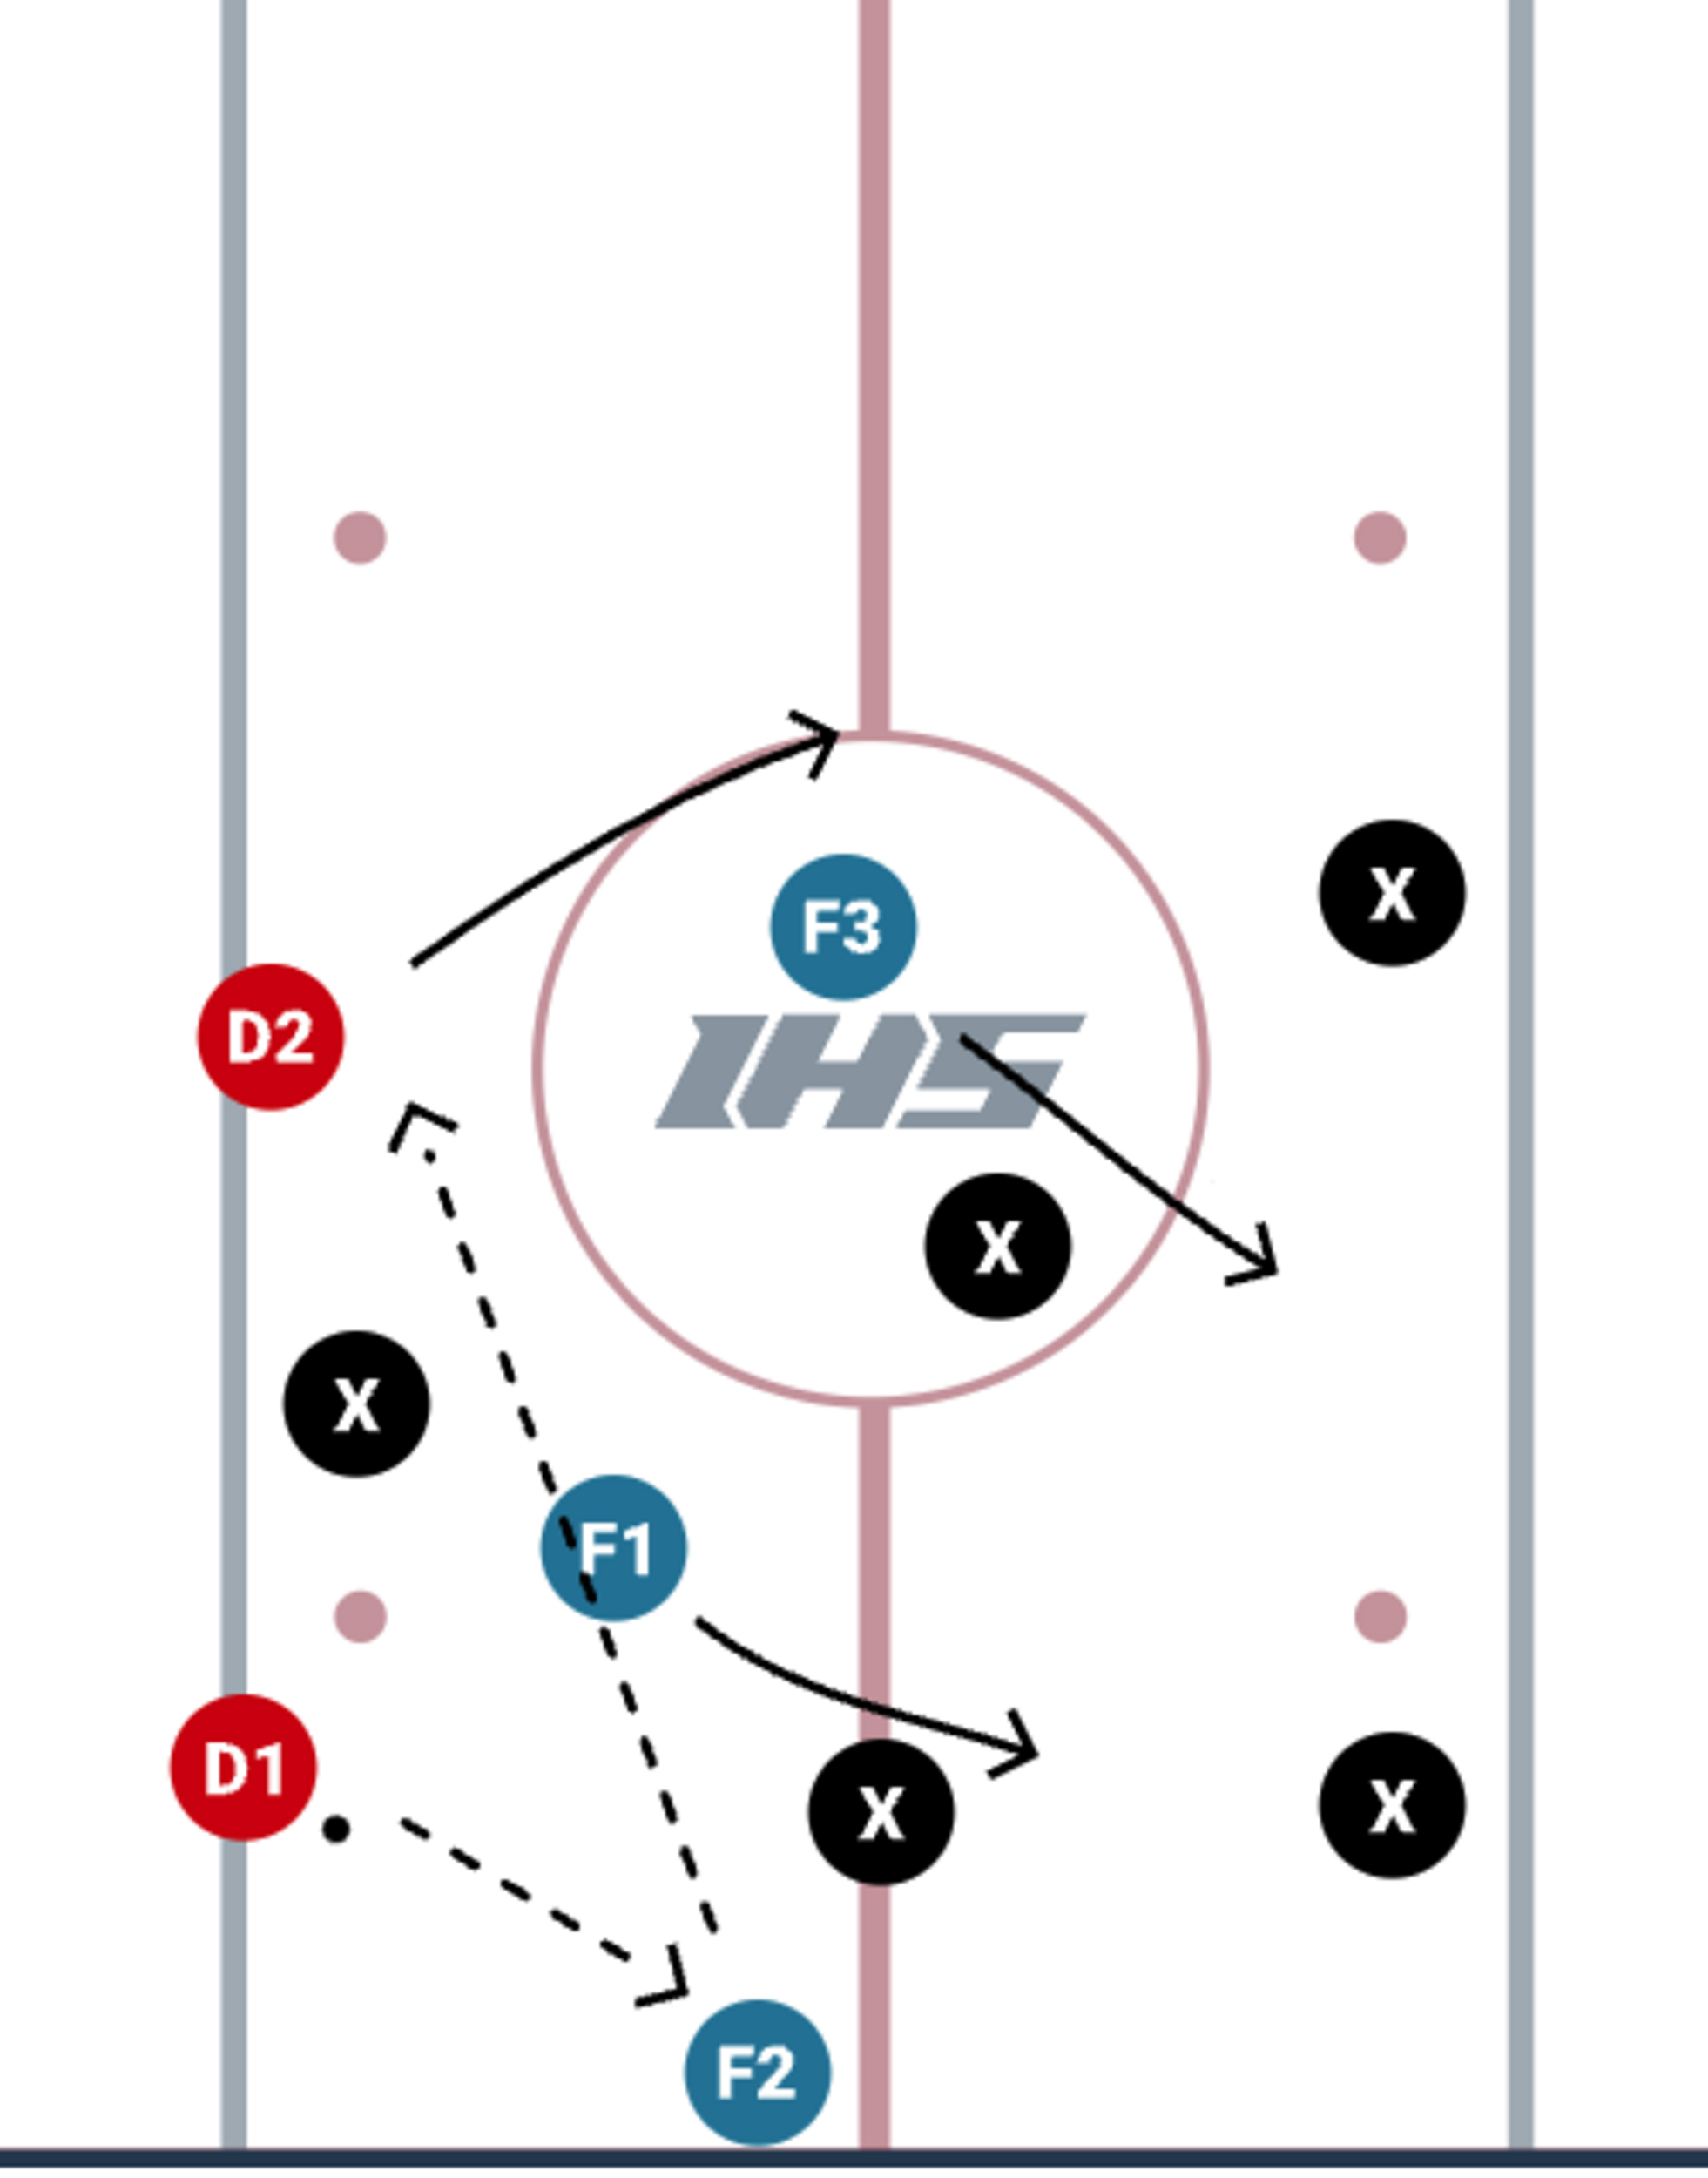
These plays enable the Canucks to move up ice with more time and speed, allowing them more controlled zone entries and making them a more effective threat off the rush, rather than dumping the puck in and trying to regain control off the forecheck.
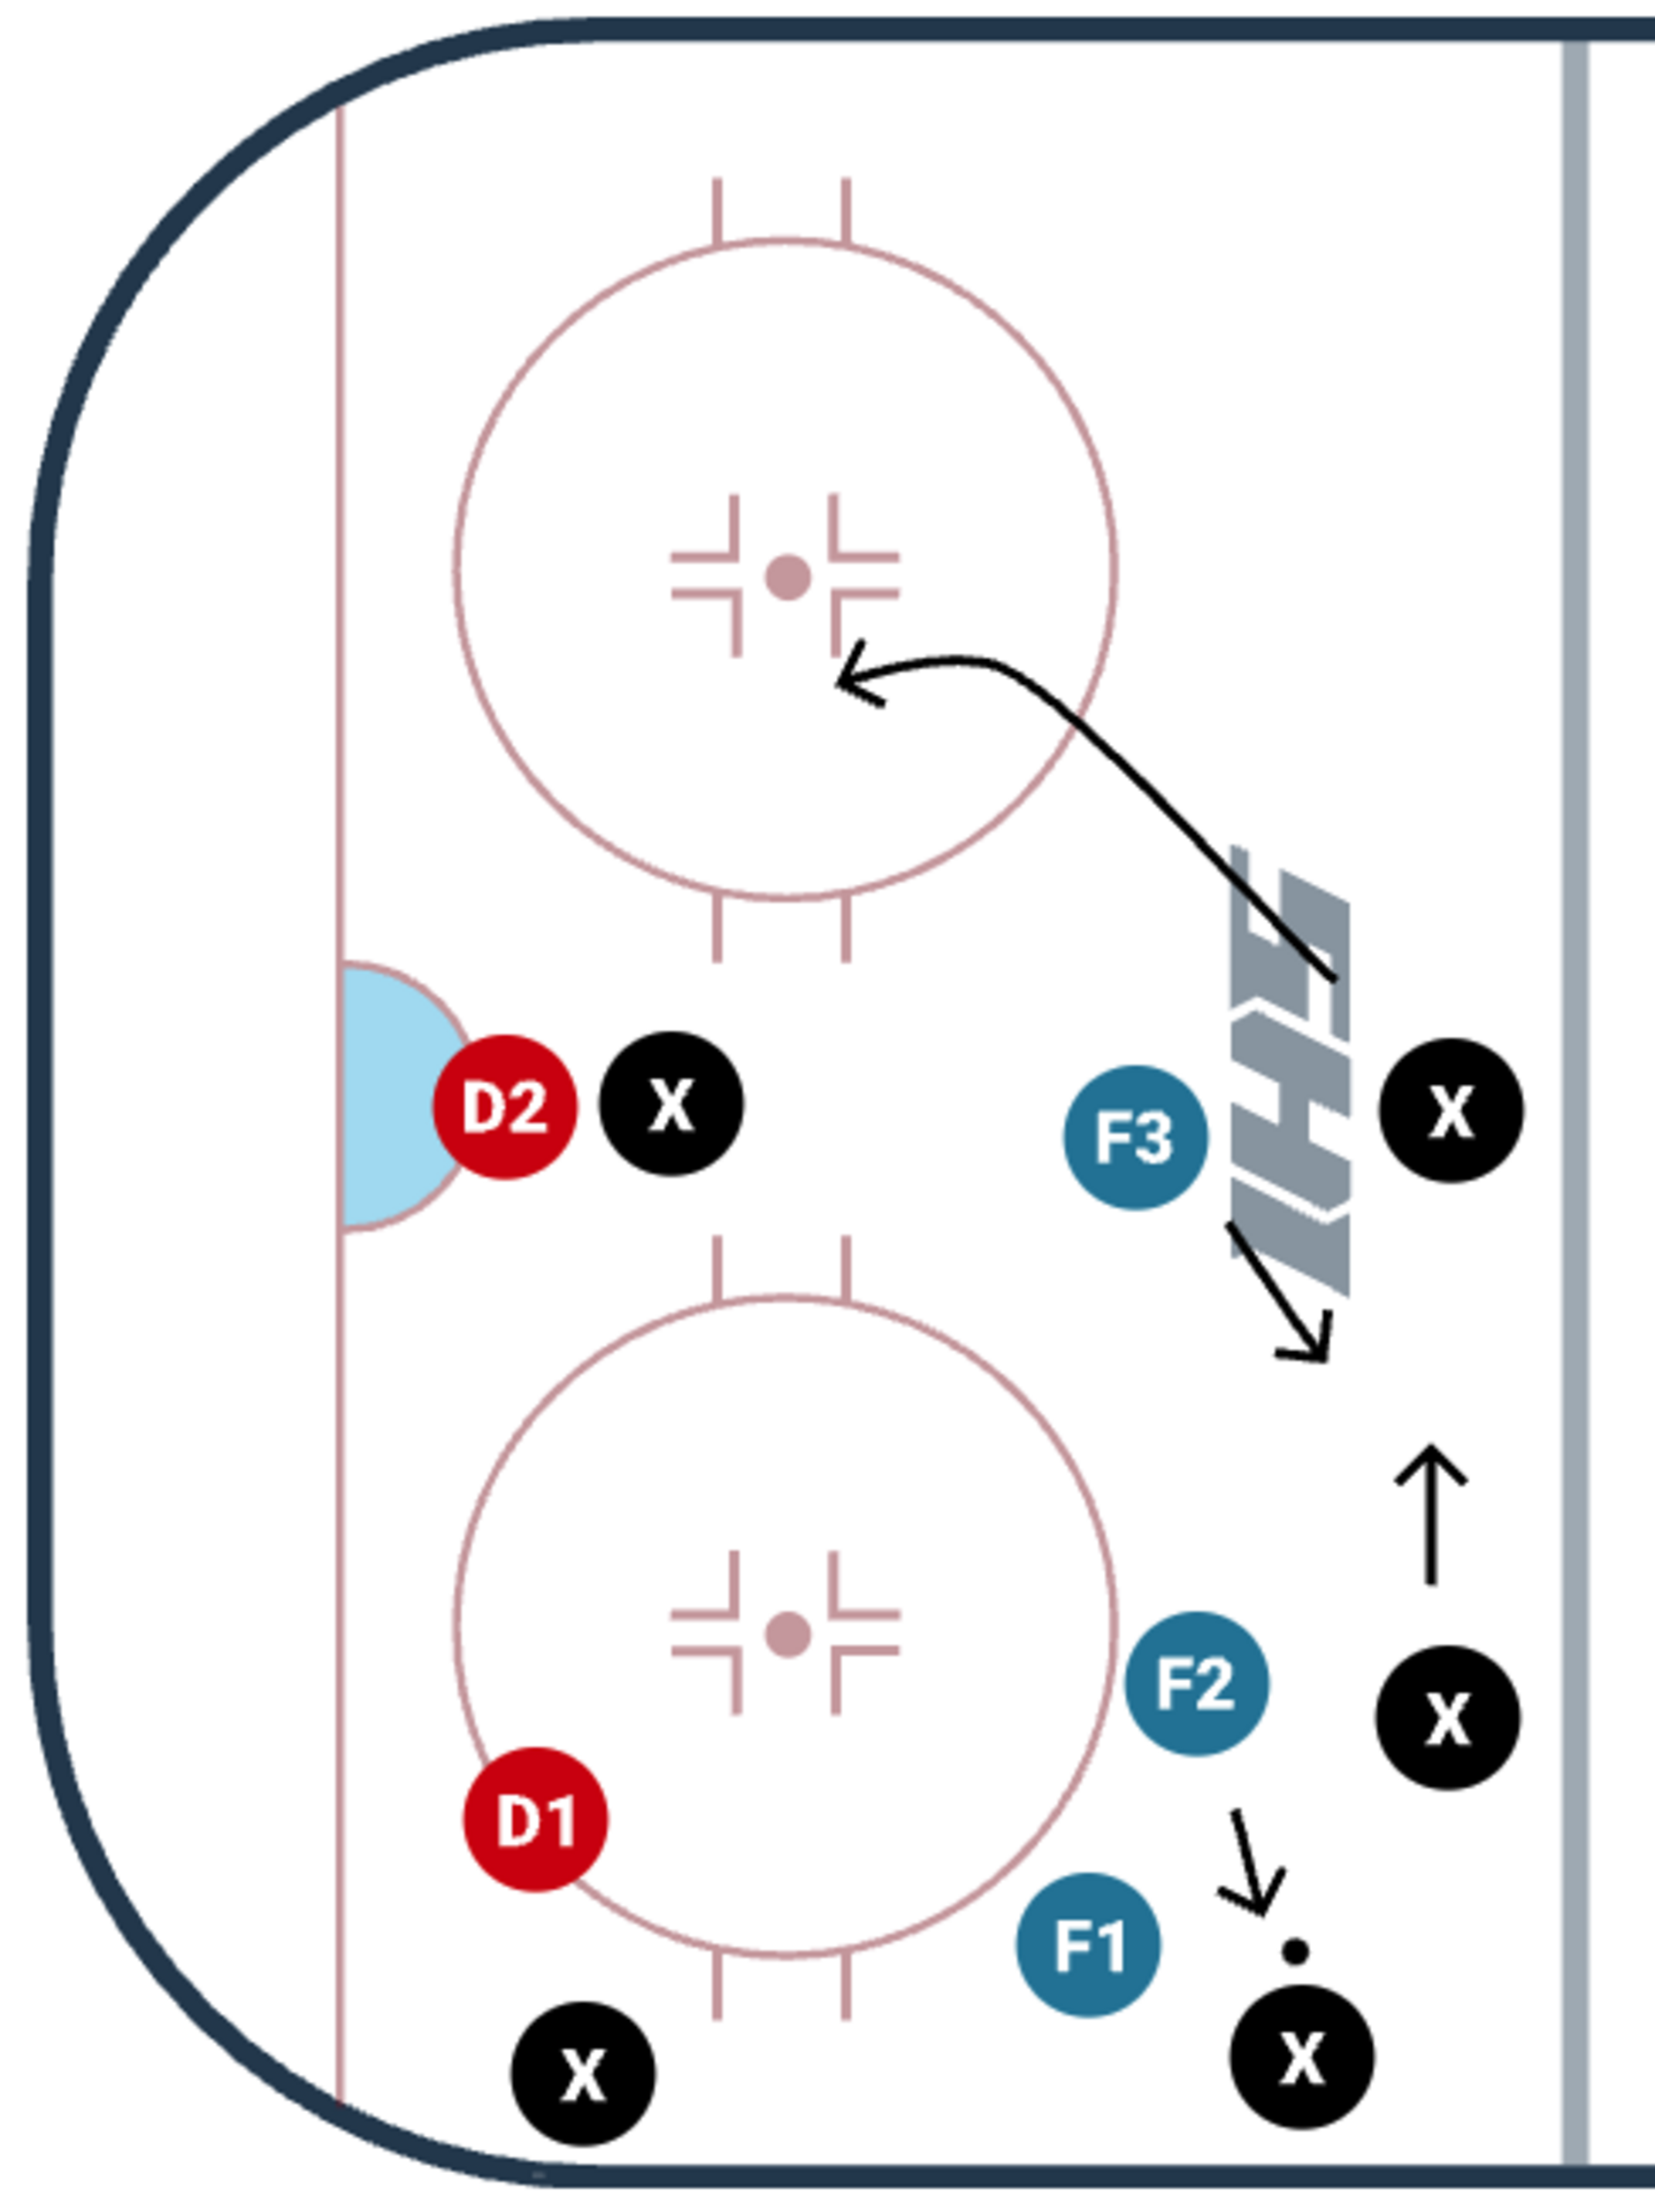
Neutral zone forecheck
The forecheck in the neutral zone is a common 1-2-2 with some slight variations. The first forward (F1) will split the middle of the ice to eliminate D-to-D passes, while the strong side winger (F2) hangs a bit lower, around the dot, than the weakside guy (F3) to take away a play up the boards, and the weak side winger (F3) will take away a pass up the middle of the ice.
The Canucks defencemen like to hang a bit further back and take away any stretch-pass opportunities.
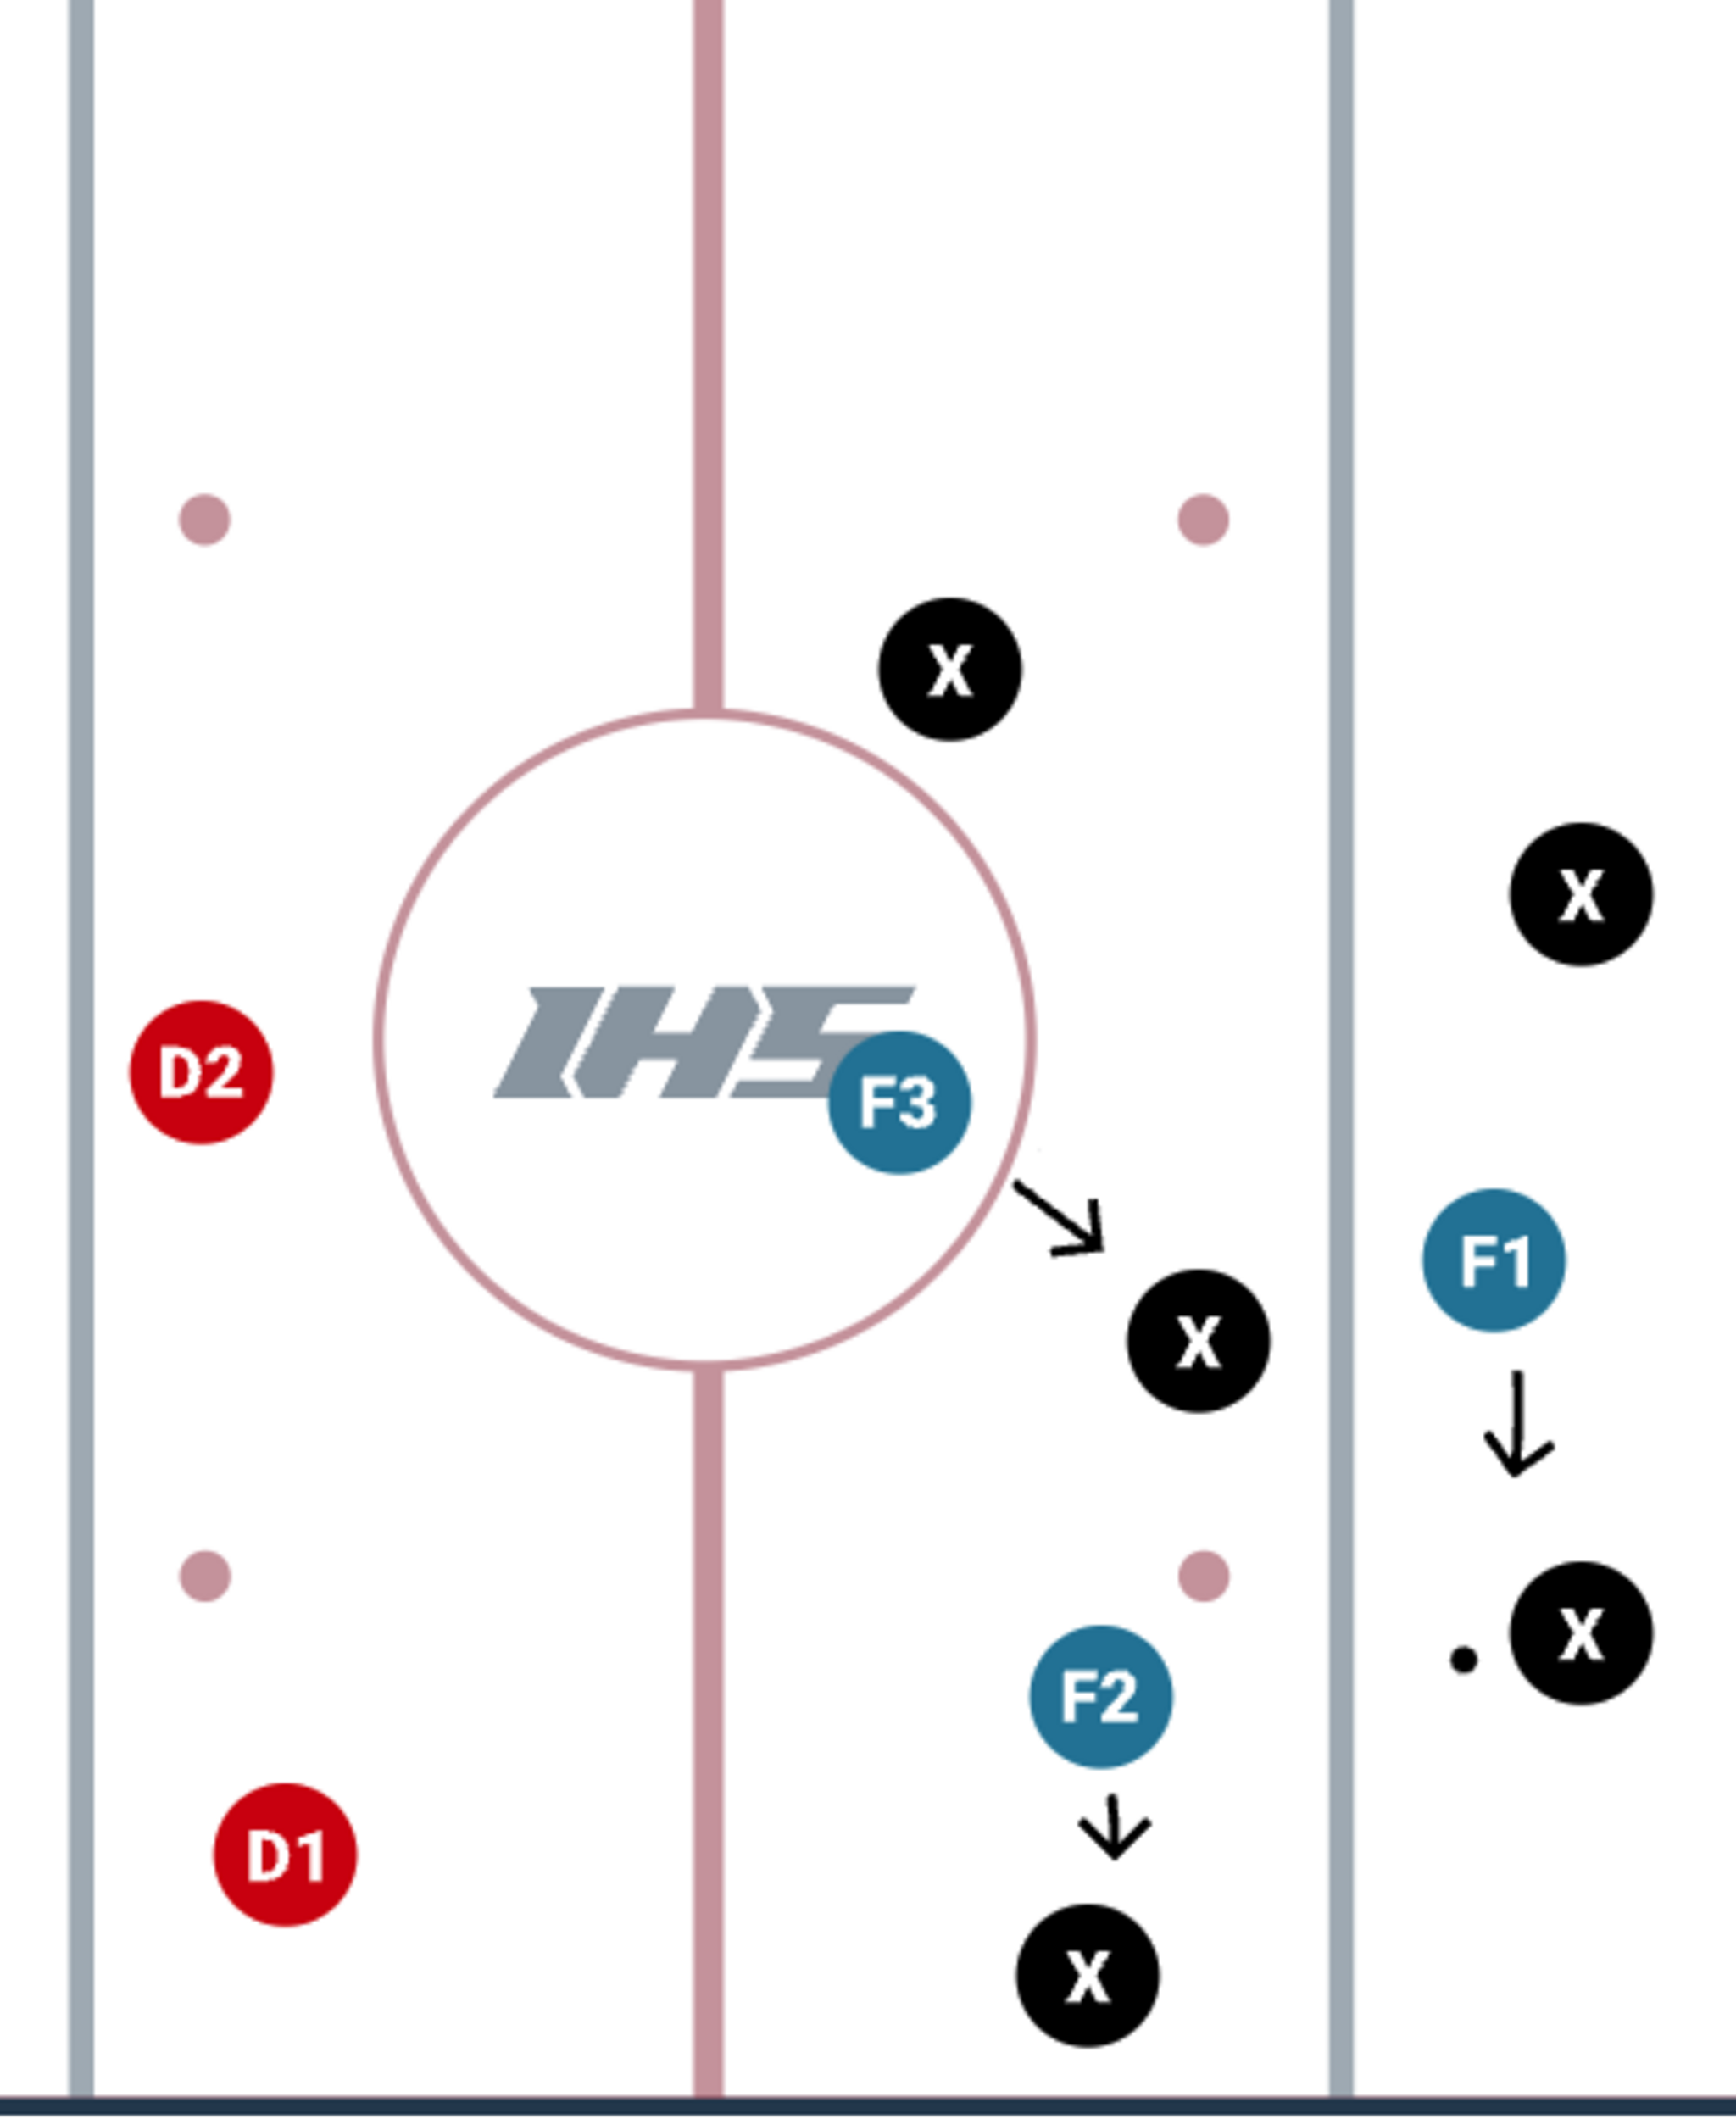
The weakside winger (F3) hanging back a bit higher gives the Canucks more of a counterattack opportunity if the puck is turned over. He will have more space to skate and make a play rather than being in the thick of things and having to just dump the puck in.
Offensive zone forecheck
The offensive zone forecheck is similar to their neutral zone forecheck, particularly on controlled breakouts for the opposing team. We see the same first guy (F1) pressuring the defenceman with the puck while the strong side player (F2) takes away a pass up the boards, and the weak side guy (F3) takes away the middle of the ice.
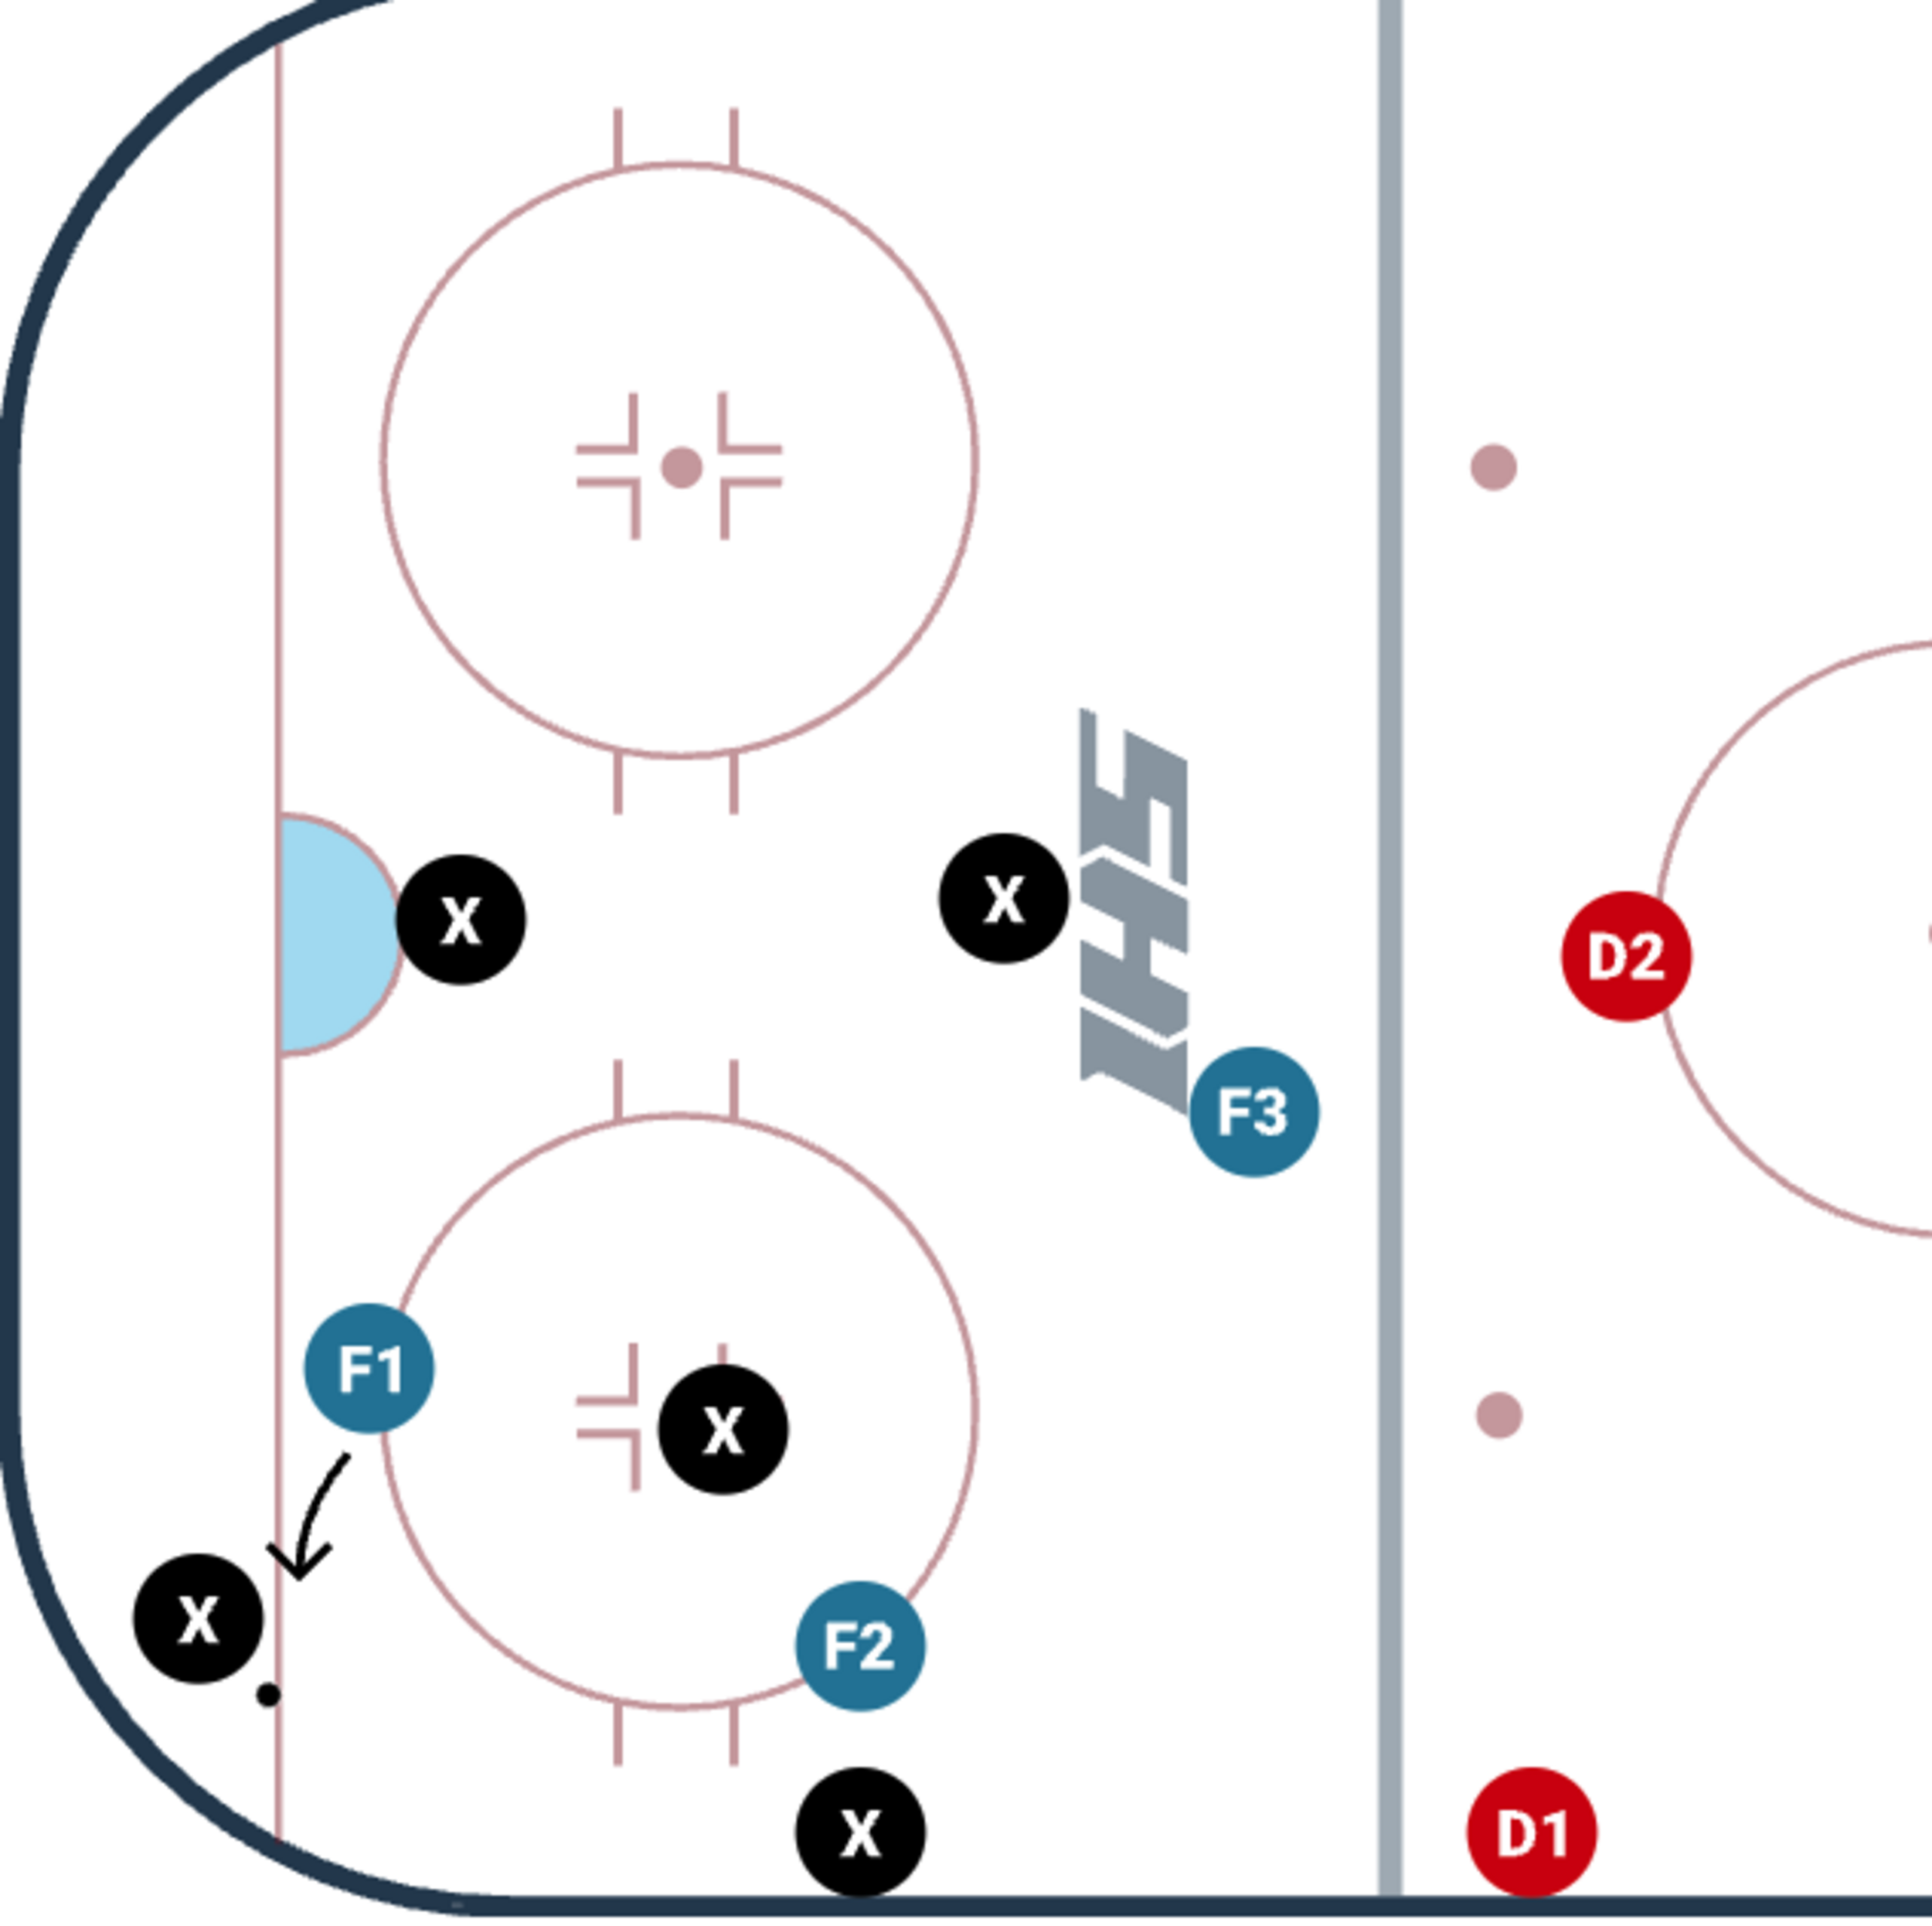
Where we see a different variation is when there’s more of a battle for the puck in the offensive zone corner. The weakside forward now becomes F2 and is ready to jump on the puck or pressure the defenceman on the other side of the ice if it’s moved D-to-D. The strong side forward then becomes the F3 and hangs a bit higher to support the defencemen in case the puck is moved up ice, so the opposing team doesn’t have an odd man rush.
This forecheck puts more pressure on the opposing team’s defence and doesn’t allow them to move the puck out of their zone easily, while still supporting back, taking away odd-man rush opportunities.
The new systems Adam Foote has implemented are quite different from what we saw last season under Rick Tocchet. The biggest theme in the new way the Canucks play is having more control and speed. When done correctly, this team can be very hard to play against because they take away a lot of their opponents’ time and space. But as we’ve seen, especially in the defensive zone, breakdowns can be costly, leaving opponents with great opportunities to capitalize.
More must-reads:
- Winners, losers from Stanley Cup playoffs: Hurricanes back in Cup Final after Canadiens rout
- Winners, losers from Wednesday's Stanley Cup playoffs: Hurricanes continue to smother Canadiens
- The 'Men's French Open champions' quiz
Breaking News
Trending News


Customize Your Newsletter
 +
+
Get the latest news and rumors, customized to your favorite sports and teams. Emailed daily. Always free!

PRIVACY POLICY COOKIE POLICY CONTACT US
ABOUT YARDBARKER TERMS OF SERVICE
By using this site, you agree to our Terms of Service and Privacy Policy.
This site is for entertainment purposes only.
There is no gambling offered on this site.
Gambling Problem? Call 1-800-Gambler.