-

-


Follow Us
-

In skiers' parlance, uphill skiing is another term for ski touring. Oftentimes, the phrase is used by ski areas to denote ski touring that happens within the avalanche-controlled boundaries of a ski resort.
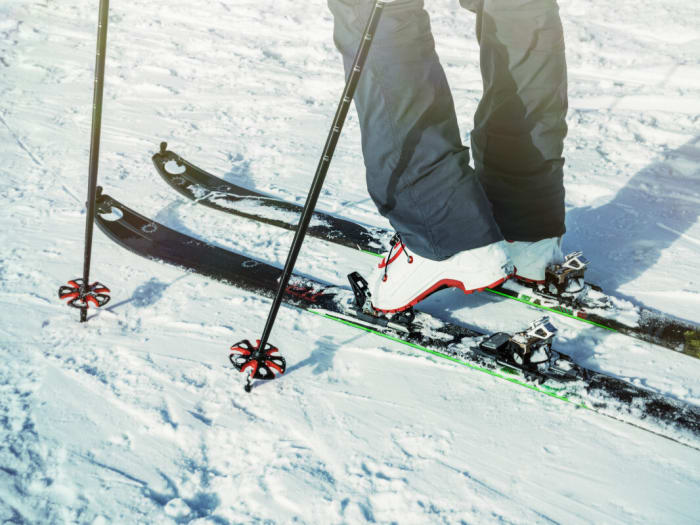
While uphill skiing, skiers use a combination of gear that includes specialized bindings, boots, and "skins"—grippy material applied to the underside of the ski—to climb a mountain without the assistance of a chairlift. Once atop the mountain, they remove their skins, click into the heels of their bindings, and head back downhill.
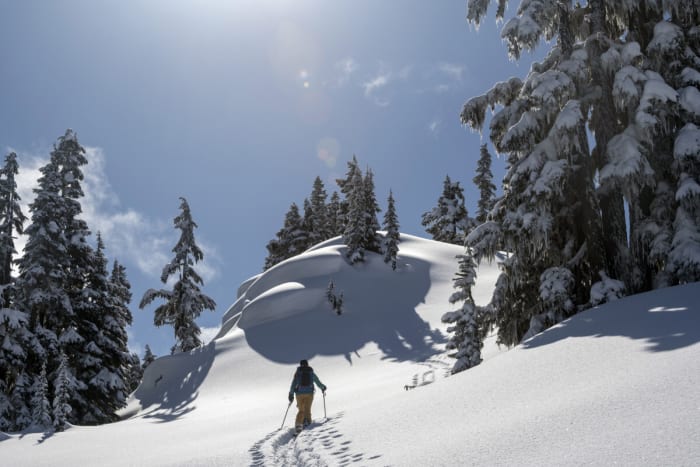
The benefits of uphill skiing are numerous—provided you're not afraid of a cardio slog. If done in the backcountry, it presents a reprieve from the crowds found at ski resorts. The promise of fresh, untracked powder is another big part of the allure, as is the sense of exploration found while tromping through woods and mountains.
Meanwhile, in-bounds uphill skiing is a great way to get exercise without worrying about the challenges associated with backcountry skiing, like route-finding and avalanche risk. These lower-intensity excursions are perfect for uphill skiing beginners who may still be figuring out their gear, too.
Want to keep up with the best stories and photos in skiing? Subscribe to the new Powder To The People newsletter for weekly updates.
Check Your Mountain's Uphill Policy
If you choose to uphill ski within the boundaries of a resort, you'll need to review applicable policies first. Some ski areas require uphill passes—others make uphill skiers stay on specific routes. Additional resorts don't permit uphill skiing at all. Get these details ironed out a few days in advance.
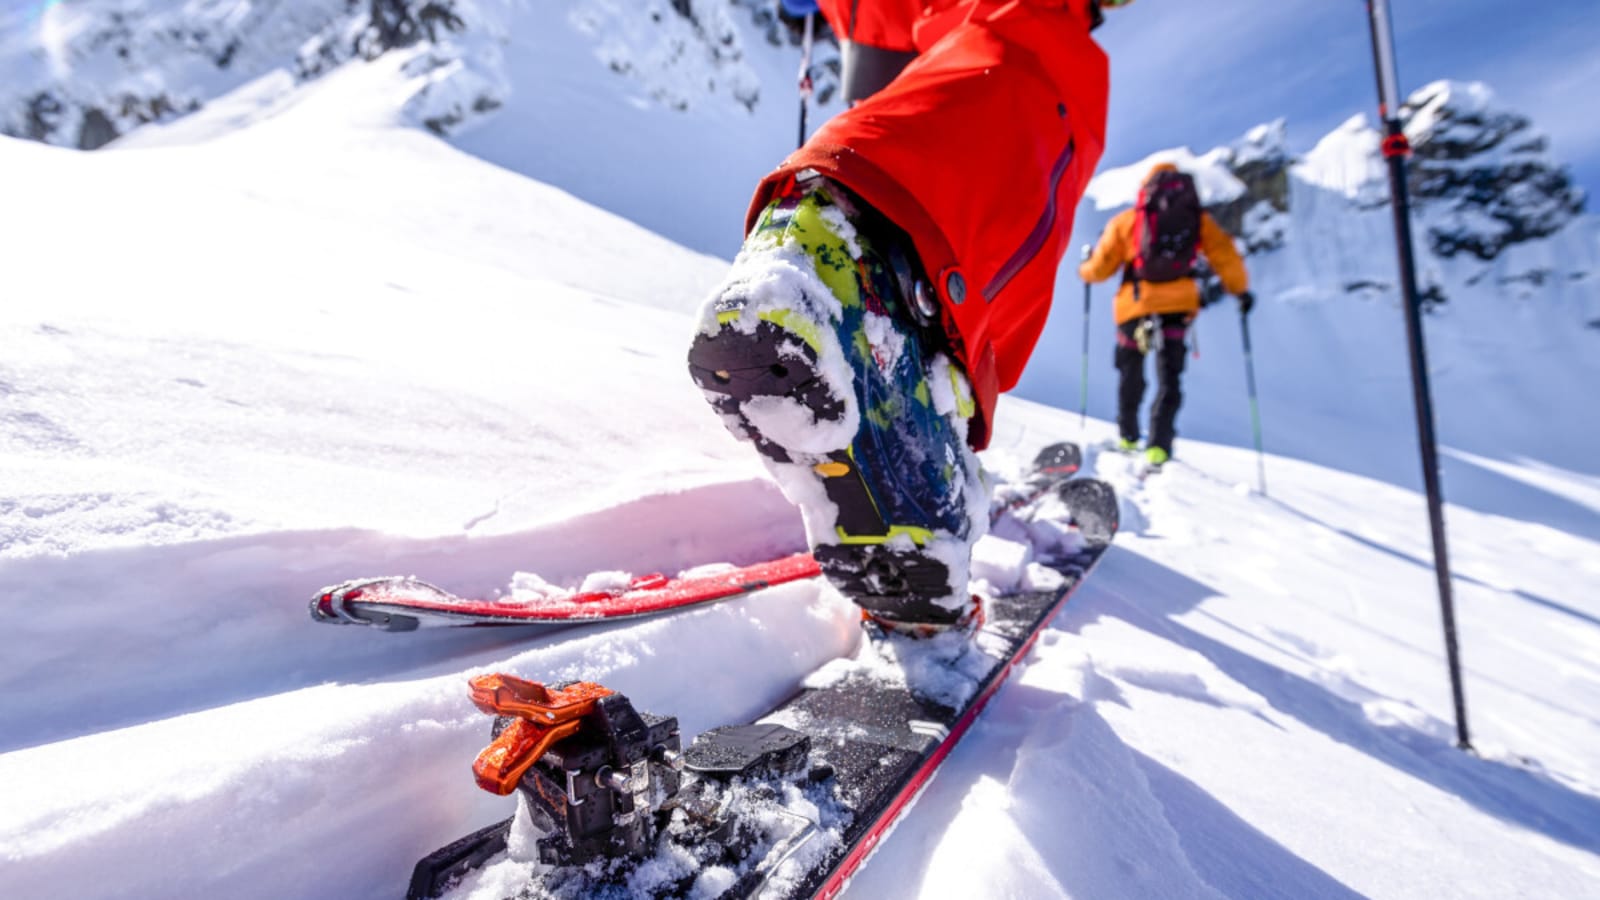
Get To Know Your Bindings and Other Gear
Uphill bindings vary significantly from their alpine counterparts. Typically, they have a toe element that clamps onto the front of the ski boot and can convert between walk mode and ski mode. The heel piece is usually convertible, too. Therefore, rather than just stepping into your binding as you would with a pair of alpine skis, you may need to do some playing around first to make sure you're in the correct mode.
It's best to figure out how all these moving parts work before you go uphill skiing for the first time. Put on your touring boots at home, and make sure you can enter and exit your uphill bindings without too much fuss because nothing's worse than fiddling with gear in the cold. YouTube and Google are your friends when determining how your specific make and model of uphill binding works.
This rule applies to touring boots, too, which can switch between walk and ski modes. The walk mode allows for greater mobility, making it easier to schuss uphill. The ski mode, in contrast, locks the upper part of the ski boot in place, providing greater control on the downhill. This mechanism is straightforward but can vary from boot to boot.
Store Your Skins Properly
Ski skins are hardy and designed to weather the elements. Still, to ensure they last as long as possible, take time after your ski day and store them properly. First, before storage, skins should be dry. Consider hanging them in your bathroom to let them air out. Then, fold them (glue-to-glue contact is okay) and place them somewhere cool and dry. Do your best to avoid getting dirt and grime on a skin's glue, too, as this can reduce stickiness.
Another tip: If you're skiing and it's cold out, store your skins close to your body between laps. Cold weather can make the glue on skins less sticky. When this happens, your skins won't adhere to your skis as well.
Be Bold, Start Cold
Generally speaking, you should wear fewer layers than usual while uphill skiing. It's common for beginners to begin climbing the skin track wearing a down coat, only to be reduced to a pile of sweat. Uphill skiing is a harder workout than you might expect, so imagine you're going for a run or a brisk hike when planning what to wear. Just remember to pack your usual skiing layers for the downhill—once you stop exerting yourself, you'll get cold fast.
There is a caveat to this rule, though. Everyone has a different body. If you don't tolerate the cold well, try starting out with additional layers. There's nothing wrong with taking a break, and putting your coat in your backpack should start to sweat. Experimentation, above all, is the best way to determine how your body reacts to slogging uphill in the cold.
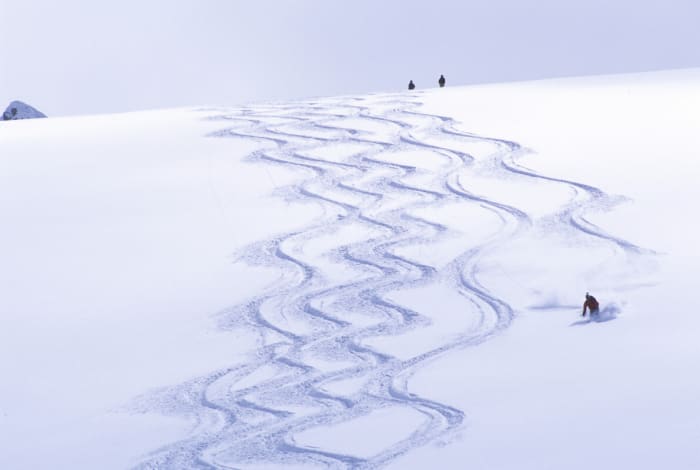
Don't Set a Skin Track That's Too Steep
Another common beginner mistake is trying to skin up slopes that are too steep. If you've been in the backcountry before, you may have noticed the skier tracks that zigzag up steep sections of a slope. Seasoned backcountry skiers do this for a reason. Trying to skin directly up a steep run will waste energy. Even worse, it may be so steep that your skins can't grip, causing you to slide backward.
So, instead of running yourself ragged, look at the slope you plan to climb and think ahead. There may already be a gentle skin track in place, but if there isn't, create long switchbacks (this advice may not apply to uphill skiing within the boundaries of ski resorts—ski resorts often have predefined routes that you shouldn't divert from).
Slide, Don't Lift
While uphill skiing, there's a temptation to lift your feet in the air as you make each step forward, but this approach wastes energy and should be avoided. Instead, focus on keeping your skis on the snow. Use your foot to drag your skis as you inch forward. It'll feel counterintuitive at first—most people are used to the motion of hiking or snowshoeing through the snow—but once you figure out to slide rather than lift, you won't get tired as fast.
Use Your Risers
Touring bindings typically feature pieces called "risers." These small components are attached to the heel of the binding and are used to elevate your heel when climbing a steep section. This places less strain on your calves and Achilles tendons and can make the climb easier. On less steep sections, you can flip your riser back so your heel lies flat.
As with layering, skiers have different preferences on riser use, though. Some may like not to use their risers at all. So, again, familiarize yourself with your gear and experiment.
Loosen Your Boots on the Uphill
Advanced and expert alpine skiers endeavor to get their boots as tight as possible before dropping in. This improves the connection between the skier and the ski, allowing for greater precision while skiing. However, uphill skiing is a different ballgame, as you could be standing in your boots for an hour or more. Loosen them so they're comfortable, and engage the "walk mode" found on the back of your boots before heading uphill.
With Kick Turns, Be Persistent
When ascending a skin track that zig zags from left to right, you'll need to perform a move called a "kick turn" as you round each corner. To do so, you'll place one foot on the upper portion of the skin track and then "kick" your back foot around the bend. No matter how good you are at alpine skiing, executing a kick turn won't be easy at first. You might catch your ski tips in the snow or fall over, so don't get frustrated. Instead, be persistent, and with time, the not-so-humble kick turn will become second nature.
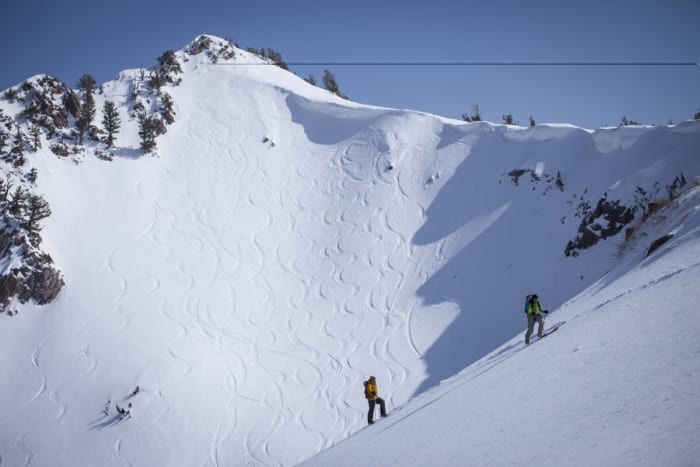
Uphill Skiing in the Backcountry
Uphill skiing out-of-bounds is an entirely different beast. Avalanches kill tens of skiers every year in the U.S. and North America, and rescue typically takes much longer than it would inside a ski resort. For these reasons, it's essential you take the proper precautions before heading into the backcountry.
Get the training: Before even thinking about backcountry skiing, you have to take an avalanche training course. While not cheap—an avalanche training course usually costs a few hundred dollars—these classes are necessary. Avalanche awareness doesn't stop after completing a course, either. Skiers can continue to bolster their knowledge by reading books like Bruce Tremper's Staying Alive in Avalanche Terrain.
Watch the forecast: Across the U.S., avalanche centers issue avalanche forecasts on a daily or weekly basis. These invaluable forecasts contain information about daily avalanche danger and specific avalanche problems. Thoroughly check and understand these forecasts before heading into the backcountry (an avalanche training class will help with this part). Avalanche.org has a map of avalanche center forecasts across the U.S.
Use the right gear: A beacon, shovel, and probe are the foundational kit items used by backcountry skiers. Without them, you'll be left unable to rescue or be rescued by other skiers. Avalanche training courses can teach you how to use these tools. Other types of gear like first aid kits, headlamps, ski straps, and emergency blankets are often carried by skiers who regularly visit the backcountry, too.
More must-reads:
- World Cup 2026 Friday takeaways: Joy for Cape Verde, heartbreak for Iran, business as usual for France
- Thunder sign Isaiah Hartenstein to huge extension
- The 'Triple-Double leaders by team' quiz
Breaking News
Trending News


Customize Your Newsletter
 +
+
Get the latest news and rumors, customized to your favorite sports and teams. Emailed daily. Always free!

PRIVACY POLICY COOKIE POLICY CONTACT US
ABOUT YARDBARKER TERMS OF SERVICE
By using this site, you agree to our Terms of Service and Privacy Policy.
This site is for entertainment purposes only.
There is no gambling offered on this site.
Gambling Problem? Call 1-800-Gambler.