-

-


Follow Us
-

 On Facebook
 On Flipboard


Looking to get rich in Neverness to Everness? Pink Paws Heist is your ticket to a seven-figure payday, and we’ve got all the details you need right here. While there’s a little groundwork to do before you can participate in the money-making mayhem and a few restrictions on rewards, Pink Paws Heist is by far one of the most lucrative activities in all of NTE, so you’ll want to make unlocking it—and, just as crucially, understanding it—a priority.
Of all of the many Neverness to Everness currencies, Fons is the one you’ll need to earn the most of, with high-end vehicles and luxury properties often running into the millions. Enter Pink Paws Heist, NTE’s bizarre reality show where you can participate in timed raids on a replica bank vault and come away with riches that are very, very real. Here’s how to get your heist on and start making some serious cash.
Neverness to Everness: Pink Paws Heist basics
How to unlock Neverness to Everness’ Pink Paws Heist activity
The only requirement for accessing Pink Paws Heist is that you need to reach Tycoon Rank 10, although that in itself will require a checklist of smaller tasks along the way. Most of these you’ll probably tick off in the course of playing the game naturally—by the time I hit Rank 10, I’d already completed all of the goals (bar the heist itself) for the next five levels—so the most demanding part of each tier is going to be the increasing Fons earning requirements.
Income is slow in the early parts of NTE and you’ll need to reach total earnings of just over 1.5 million Fons for Tycoon Rank 10. You earn Fons naturally from most activities in the game, albeit typically in fairly low amounts from things like the Miles Apart quest in NTE, but whatever you choose to do around the city is likely to help with lining your coffers. That said, there are several methods with which you can make decent dents in that lofty target and get heisting sooner, so let’s run through them quickly now.
First up is Hethereau Hobbies, a selection of mini-games that expands as you rank up and lets you play whichever you want to turn City Stamina—a timed resource that refreshes weekly—into Fons at a common rate of 1,000 Fons per stamina point. City Stamina is initial capped at 100, rising to 200 at Rank 5, making for a total of 200k Fons per week available prior to Rank 10 just from racing, doing deliveries, selling fish you’ve caught, and so on. Play whatever you like here, try to spend all your stamina before the Monday reset, and watch the Fons roll in.
The next option is Fair Exchange, where you can trade Lost Pieces and Warp Pieces earned from banner pulls for all sorts of useful items, including Fons. I’d be inclined to be a little bit cautious with these, however. Warp Pieces aren’t exactly common and Warp Exchange is a bottomless supply of premium banner pull dice, so it’s rare that you’d want to pick up anything here other than Solid Dice or perhaps Tri-Keys. Lost Exchange is a somewhat safer bet so long as you’ve got the Pieces to spare and don’t need anything else in its selection, and the 200k Fons available here for 300 Lost Pieces shouldn’t break the bank if you’ve been actively pulling for characters.
Lastly, you might be surprised how lucrative exploration can be. Rounding up Oracle Stones by finding ravens all over the city can turn a tidy profit, as delivering these to The Witch’s House near Eibon grants 30k Fons every other tier, for a maximum of 180k should you manage to find and return them all. On your travels, you might also be fortunate enough to happen upon the odd safe which you can crack for a major windfall… I stumbled upon one in the Midas Arc Workshop in New Herland that contained 100,000 Fons, and I’m sure there will be other such treasure troves out there waiting to be found.
Once you’ve ticked off all the tasks in the City Tycoon menu and pulled in the 1.5 million Fons needed, you’ll get a new quest pop up as soon as you advance to Tycoon Rank 10, which means it’s time to head over to the bank in northern New Herland on the east side of the city. There’s a Wertheimer Tower right next to it, so be sure to unlock this to make fast travel there more convenient. After speaking with Chiz, Pink Paws Heist should be unlocked in the Hobbies menu, and you can launch it (and browse rewards) at any time by visiting the bank and chatting to Chiz again.

How does Pink Paws Heist work?
The rules of Pink Paws Heist are really quite simple—steal as much as you can and get out before time runs out. In reality, though, there’s a bit more to it than that. Loot drops are random, so one run might offer up nothing but junk while the next sees you hit the motherlode. On top of that, the various phone booths scattered around each floor that serve as your escape routes aren’t always active, making it hard to formulate a comprehensive gameplan ahead of time.
This means you need to be ready to adapt on the fly, whether that takes the form of backtracking to a previous exit or punching forwards to the next if your ideal one is offline, and both take additional time. You only have 12 minutes total and if you run out of time, you leave with nothing. Which is bad, obviously.
On the plus side, not everything in this mode is quite so transitory. Important items like keycards can be saved between heists so long as they are not used, meaning you don’t have to rush to use every key item you pick up in the run on which you find it. Rather, you might want to stockpile these resources while making multiple safer probing runs on the vault, before launching an all-out cash-grab where you walk away with everything that isn’t nailed down. Knowledge, too, is a persistent factor, and while you can never know what you’ll find, you should at least be able to develop a sense of where you’re supposed to be going. Hopefully the next section will help on that front…

NTE: Pink Paws Heist map layout
While the locations of valuables will change every time you run Pink Paws Heist, the map itself does not, although the in-game map being disabled in the vault doesn’t do you any favors here. Still, you should find that you start to get a feel for the bank’s (admittedly quite vast) floor plan as you repeatedly run it for more loot, but I’ll go through a general progression path for all four floors to get you started… or in case you get lost. Hey, it happens to the best of us.
G: Reception Hall
The entrance area is pretty simple, as you might expect. There are often a few trinkets up in the balcony area but I’ve never found anything particularly special up there, so to push deeper, pick one of the locked cage doors into the tellers’ offices on either side of the hall. There are several enemies to deal with here, then you can proceed via another locked cage door at the back-right of this office and head downstairs. This opens out into a large area full of safe deposit boxes and another forced encounter, with the elevator to the next floor at the back. If you have the relevant access cards, the doors on the left and right can instead take you straight to either the Collection Floor or the Vault Floor, skipping the labyrinthine Office Floor entirely.
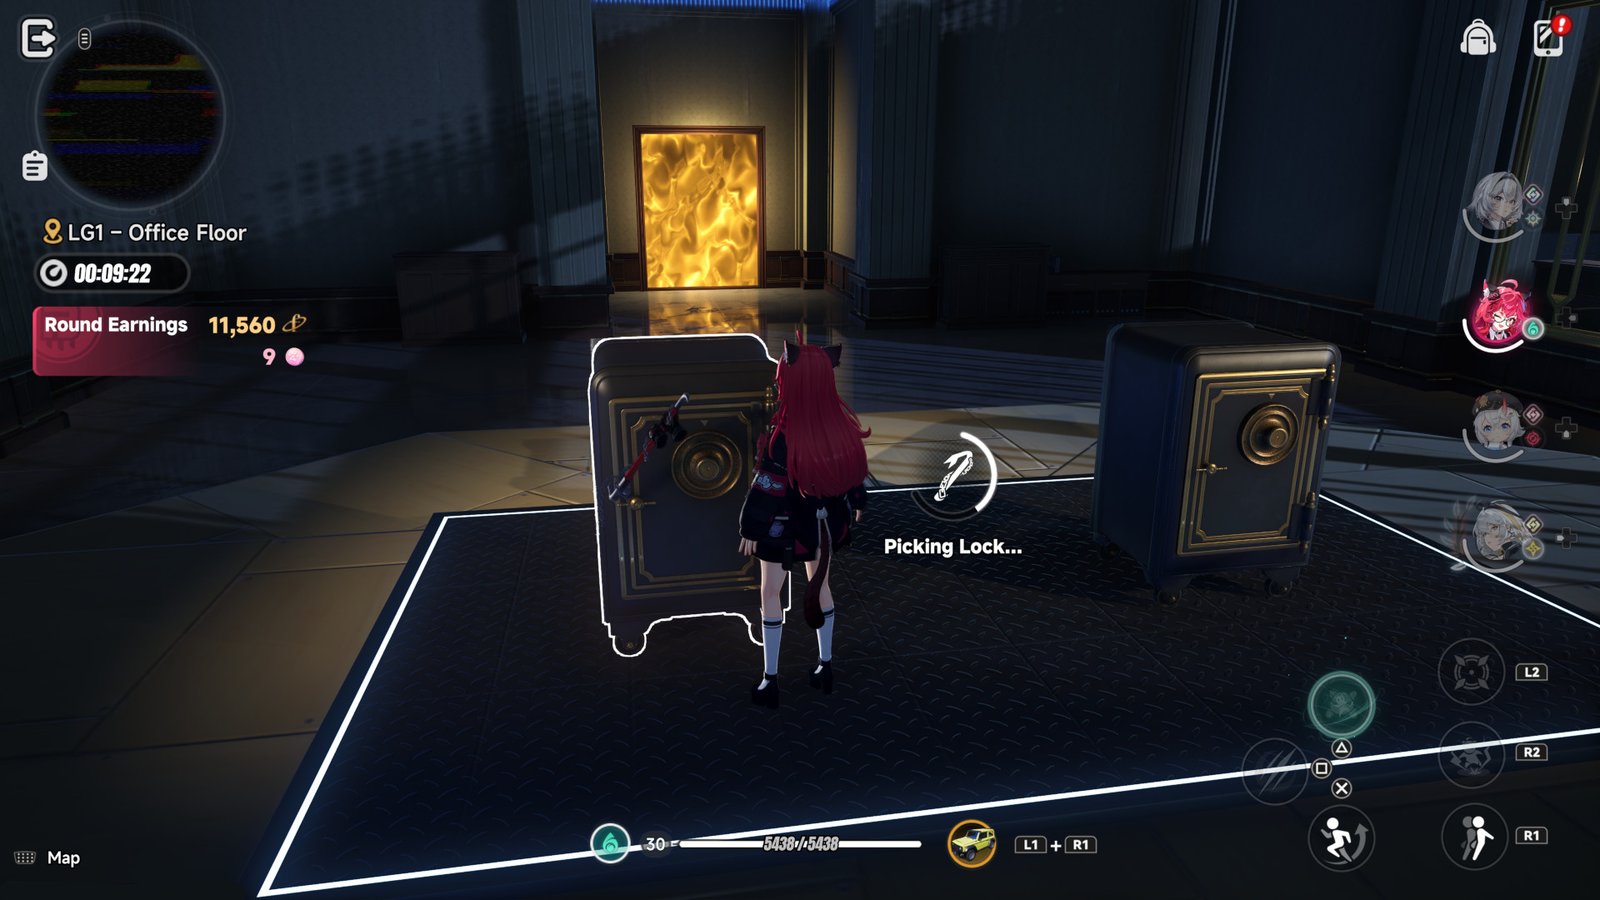
LG1: Office Floor
This is where things start to get spicy, and the office level feels like the biggest floor by a fair margin. New hazards include drones (avoid their spotlights to avoid getting dragged into avoidable battles) and laser beams (just ‘avoid’ will suffice here), with a general rule of thumb here being that the more lasers you see, the closer you are to the next elevator. This whole floor effectively forms a large ring around the void space you see ahead of you when entering so just pick a side and follow it round, with passing through large portals usually being a sign that you’re heading in the right direction.
You’ll know you’re about halfway around this floor when you reach a room with two safes in the middle, protected by a pair of cycling laser fences. Opening either of these will cause the other to disappear and spawn enemies, though you can press onward before the exit is sealed off if you move quick enough. In the following set of rooms, you have two options: a straight shot dead ahead past some more drones and beams, or the office off to the side with both a mini-boss and a bunch of extra loot. Whichever you pick, you’ll eventually wind up at a small set of stairs leading up to this floor’s final chamber, guarded by several waves of enemies. There’s also another side office here full of goodies, but expect to be ambushed in there.

LG2: Collection Floor
Another fairly large floor, but hey, at least the exit is right ahead of you this time! There’s a fair bit to explore if you have time to take the scenic route, but what’s directly in front is also pretty important. That large mess of floating cubes at the top of the stairs is the Chaotic Core, one of two items needed to gain access to the core vault on the lowest level… but the other seems to be a completely random drop, so that’s fun.
To claim the Chaotic Core, you need to activate and defeat all four suits of armor guarding it, and they’re no pushover. The good news is that Cores, like keycards, can be held onto for future runs. Since you can hold two of these in total, it’s worth making sure you pocket a couple on early runs so you can both have them ready to go and skip this whole drawn-out encounter when you eventually make a play for the main vault on the floor below.
The gate behind the Core leads to the elevator to the final floor, though you might notice several familiar sets of armor in the same room. If you try to access the elevator without a keycard, these will spring to life and interrupt your lockpicking attempt, so be ready to dodge then deal with them accordingly. Once they’re down, you can move down into the depths of the bank, where riches galore await.
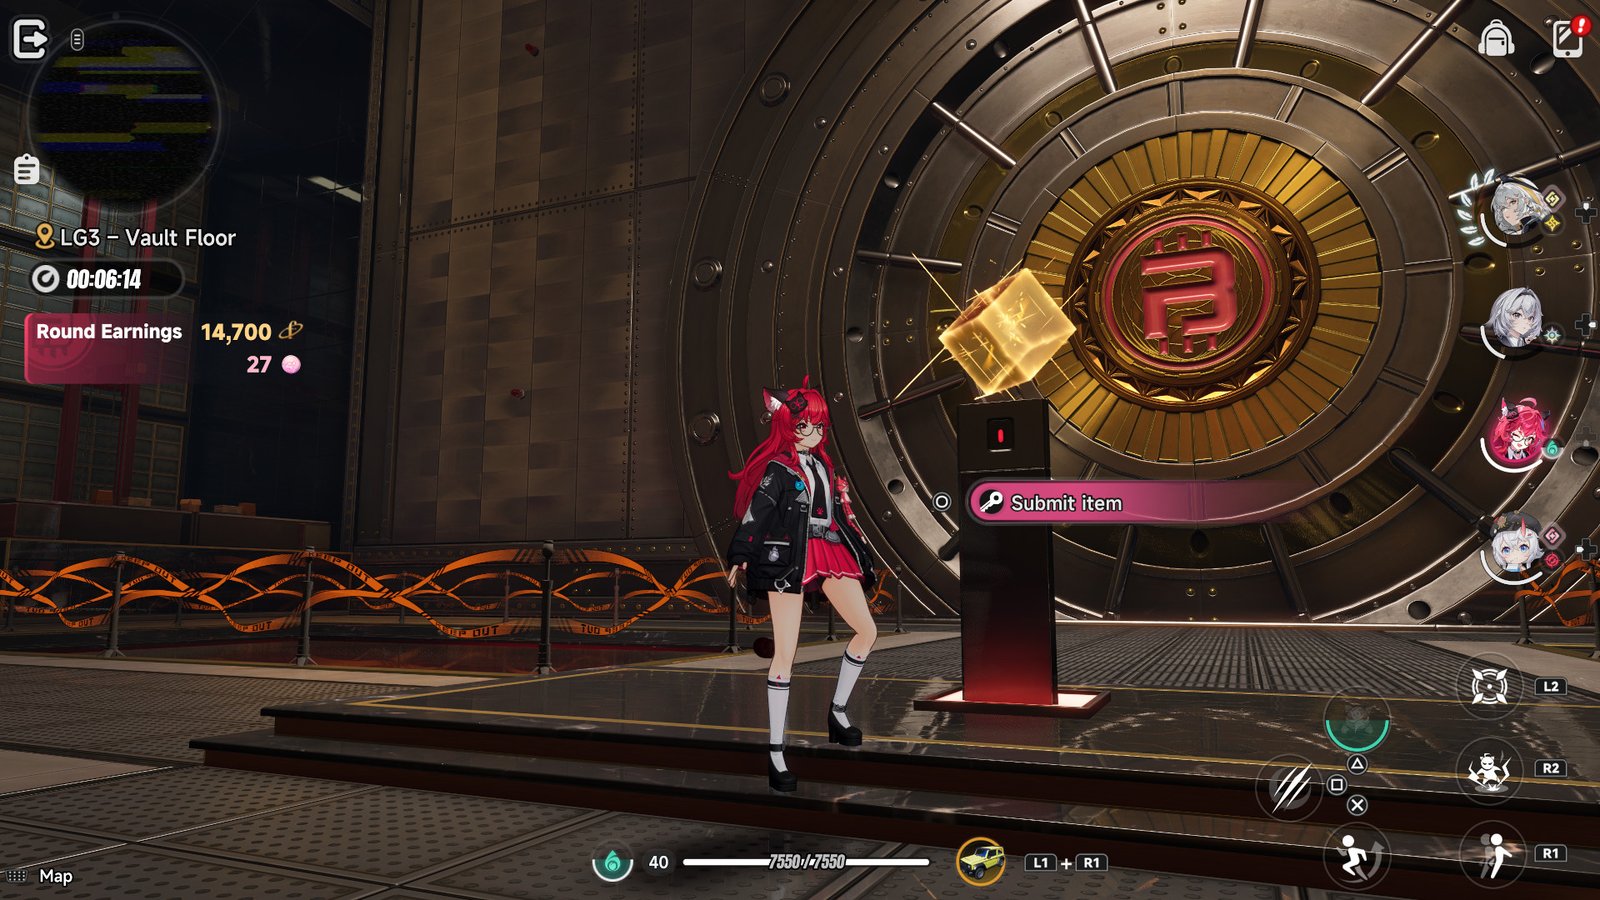
LG3: Vault Floor
Hold up, that should probably have said “where riches galore await, as long as you brought keycards.” The lowest level of the bank is crawling with enemies but compared to previous floors, there’s not a huge amount of loot up for grabs here unless you have the means to access the Vault Floor’s various… well, vaults. And since keycards appear to be completely random drops that can seemingly be found anywhere in the bank, you might be better served often ignoring the lowest level and instead spending some runs combing LG1 and LG2 to find said keys to prepare for that eventual grand payoff.
The main vault is dead ahead from where you start on this floor, but those with keys for the smaller numbered vaults will need to pick through enemies as they branch out to the sides to find and claim their prizes from those. For the main vault, you’ll need both a Chaotic Core and Advanced Clearance Card I, and inside you’ll be pitted against the final boss of Pink Paws Heist, Mammon—the same foe you face in the Realm of Greed, which makes sense.
Best make sure there’s plenty of time left on the clock if you want to attempt this, as it’s far from a quick or easy fight. There’s a fat wad of cash on the line here—both in terms of the stack of extra Fons you stand to win if you come out on top and the earnings from the rest of the vault that you risk losing should you fail—so make sure your remaining time and party health are looking good before you go for this all-or-nothing gamble. With vault layout covered, let’s close things out with some general advice as to how you should approach this unique game mode in NTE for maximum profit.
Neverness to Everness: Pink Paws Heist tips and tricks
- Don’t worry about leaving the bank to heal (or worse, using consumables) before starting a new heist run… your squad will be fully topped off upon loading into this mode.
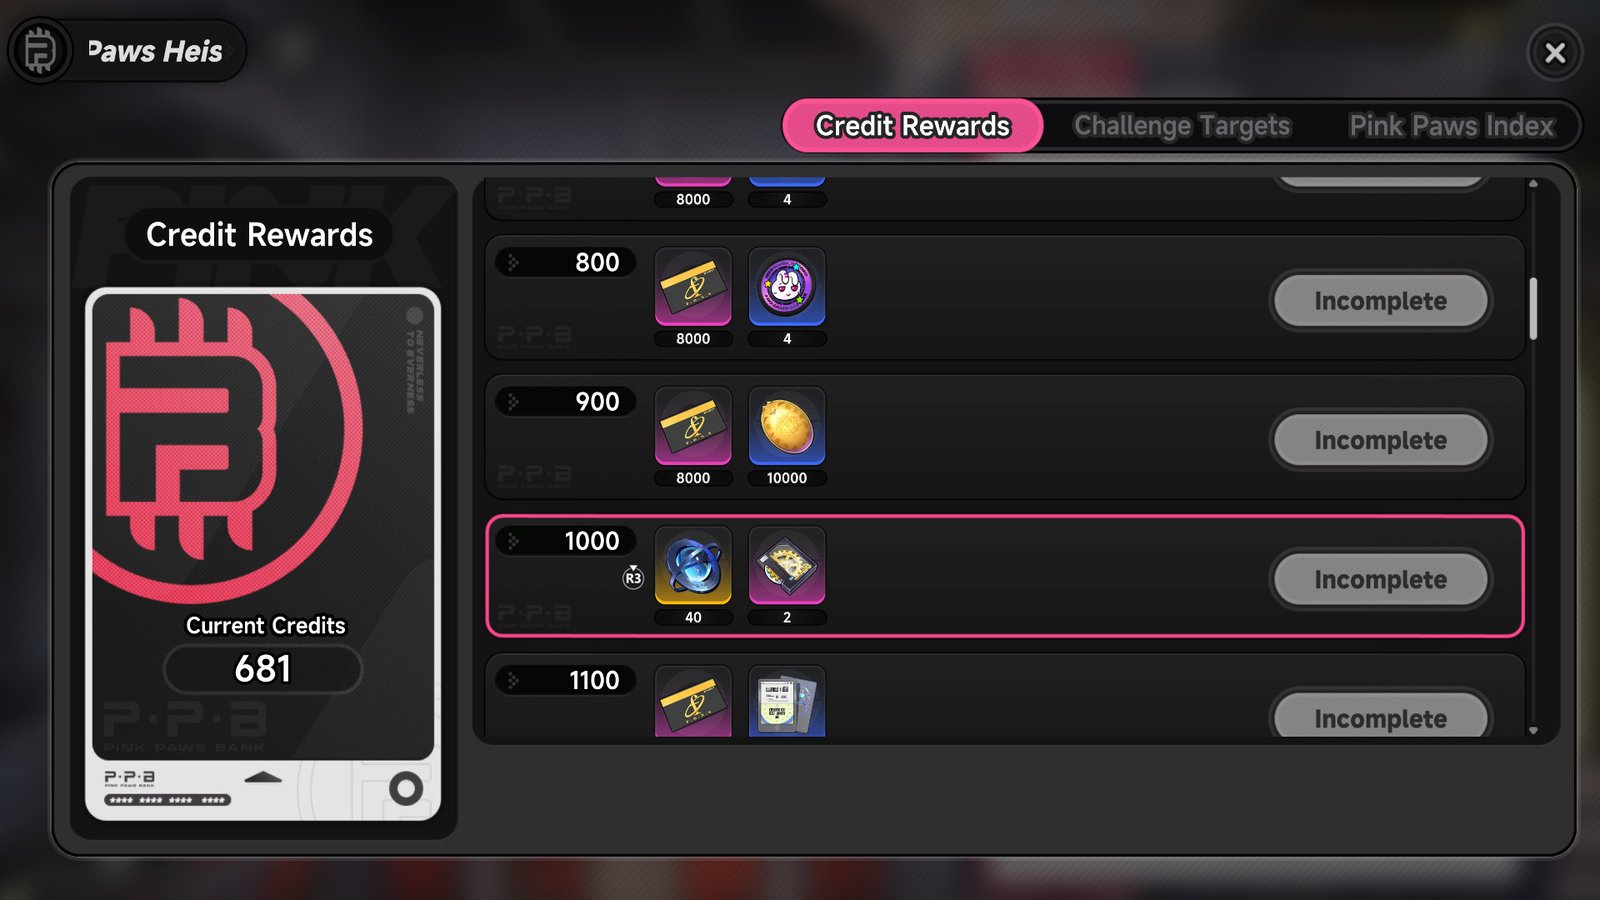
- Earning Fons isn’t the only reason to run Pink Paws Heist, and the activity actually has two additional rewards unique to this mode. Pink Paws Credits can be amassed to earn bundles of goodies for hitting various milestones via the icon in the bottom-left of the heist launch screen. Paw-Paw Coins, on the other hand, can be spent in Chiz’s Exchange Shop for a selection of unique vehicles and cosmetics, though the eye-watering costs of most of these will make them long-term goals rather than quick cash-ins.
- Don’t get too greedy. Some exits can be closed off at random from the start while others will be locked down as a run goes on, so if you’re sitting on a decent stash and find yourself with an opportunity to get out, there’s no harm in taking it. You can always just jump right back in for another run, and leaving with something is always better than leaving with nothing.
- Pink Paws Heist can also be played in multiplayer mode, and while the difficulty will scale up to match the number of participants, so too do the rewards. Drops should be more plentiful, rare valuables more common, and Paw-Paw Coin payouts improved, so finding friends with whom to run the heist ought to help you earn even more, even faster.
- Taking damage in combat can cause you to lose valuables you have collected along the way, reducing the payout when you come to extract. This leads to a trio of guidelines that can help mitigate losses, the first being that until you’re comfortable with clean runs of the first floor, it might be an idea to deal with all enemies before you even start snatching loot to avoid losses entirely here.
- Second, this mechanic actually makes low-value loot much more appealing, as having loads more inexpensive stuff than valuables will make those plentiful lesser items more likely to be dropped than the big-ticket ones.
- Finally, at least for this topic, try to avoid unnecessary combat as much as possible, as enemy drops are generally not that good and it just adds extra risk to your runs, not to mention the time loss.

- If and when you do get into fights, there is a neat little trick that can help make sure time spent fighting is not time wasted. Since there’s no animation for picking up loot, it can be done even in the middle of attacks so long as you’re close enough to the goods. Kite enemies around an area as you whittle them down and you can scoop up all the shinies along the way to be more efficient, although this might take a little practice and generally works better with characters who are simpler to use (especially ones with a little more range to their attacks) than complex ones.
- The vault’s security systems and their hitboxes are surprisingly accurate, and this can give smaller characters like Sakiri an advantage when dodging laser grids. She’s actually able to low-profile under quite a lot of the beams to slip through more safely and easily than most others, so be sure to use this to your advantage where you can.
- This one is an incredibly minor optimization but anything that saves time is helpful, right? Skipping the heist intro cutscene dumps you into a prep room with a countdown before you can begin, but letting it play out fully actually takes slightly longer than the prep sequence lasts, causing you to lose around 15 seconds of heist time. This is likely a quirk caused by lengths of audio lines differing in various languages so your mileage may vary, but the bottom line is that you should always skip the intro once you’ve seen it in order to maximize earning potential, even if it does still mean a moment of waiting around.
- Lastly, and this is from an in-game tooltip but I know many people won’t see or read it so it bears repeating, Pink Paws Heist uses its own special Character Balance Mode. This means that the characters you bring use fixed stats rather than those you’ve built for them, which explains why it feels like enemies here can hit much harder and take more of a beating than similar level equivalents elsewhere in the game. It does also note that Awakenings you’ve unlocked are an exception and do remain active during the heist, so if you’re struggling, swapping in characters with more Awakenings might be just the leg-up you need to take the bank for all it’s worth.

And that’s a wrap! Neverness to Everness’ Pink Paws Heist is a really enjoyable and rewarding game mode that you should take full advantage of to boost your cashflow, even if the random keycards and exits can make some runs feel much more stressful than others. With a bit of practice, though, you should be able to almost always come away with a decent amount, and with no limit on how many times you can hit up the vault, this should mean you can comfortably add a cool million Fons to your balance with each two-weekly refresh. Happy heisting, hunters!
More must-reads:
- Zack Wheeler gives blunt response to not being named All-Star
- Former USWNT star Carli Lloyd slams Christian Pulisic for underwhelming World Cup showing
- The '2026 National League All-Stars' quiz
Breaking News
Trending News






Customize Your Newsletter
 +
+




Get the latest news and rumors, customized to your favorite sports and teams. Emailed daily. Always free!
PRIVACY POLICY COOKIE POLICY CONTACT US
ABOUT YARDBARKER TERMS OF SERVICE


By using this site, you agree to our Terms of Service and Privacy Policy.
This site is for entertainment purposes only.
There is no gambling offered on this site.
Gambling Problem? Call 1-800-Gambler.