-


Follow Us


The Support Role in Overwatch is trusted to save their teammates through healing. It has often caused the debate of Support versus Healer, with ML7 (an Ana Main content creator) naming an account SupportNotHealer. Today, we do away with your teammates‘ wants to be a Support and instead become the true Damage Hero. Your teammates do not need healing if the enemies are dead.
Overwatch Stadium Ana
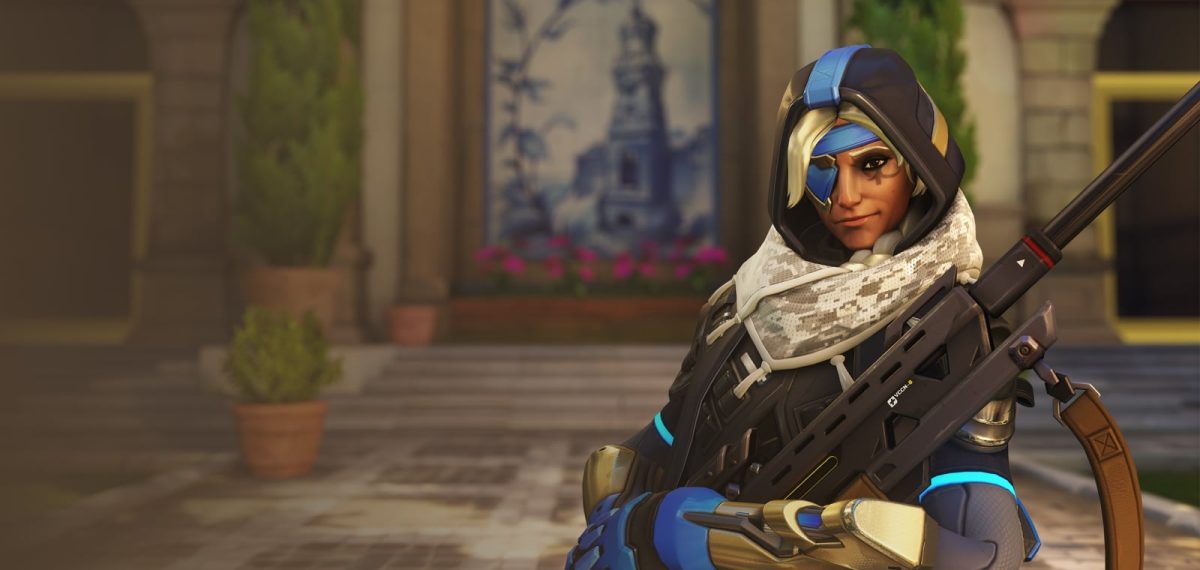
Since Ana’s release in Overwatch 2, she has been a fan favorite amongst players, especially the non-support mains. Her ability to deal with damage and offer healing on the side makes her extremely fun to play. With the introduction of Stadium, we can turn Ana into a ridiculous Damage threat with a hint of mobility to get away from the pesky Genji hunting you down, or if you would like to hunt down the terrified mortals. We even throw in some assistance to our teammates to keep them happy.
-
Powers
-
Round 1
- Pinpoint Precision – Biotic Rifle can now critically hit both allies and enemies.
-
Round 3
- Tactical Rifle – While scoped, Biotic Rifle will lock onto allies for guaranteed hits.
-
Round 5
- My Turn – Nano Boost also applies to yourself for 50% of its duration.
-
Round 7
- No Scope Needed – Landing unscoped shots with Biotic Rifle grants 10% Attack Speed for 2s, stacking up to 3 times.
-
Round 1
-
Items
- Potent Projectiles
- Dash Boots
- Perfected Formula
- Tranquilizer
- Weapon Jammer
- Eye of the Spider
Overwatch Stadium Juno
Juno’s supportive capabilities have never been in question since her release. However, she does not provide nearly as much consistent damage as other Support Heroes. Juno in Stadium is a different story. Her Pulsar Torpedo build leaves players cowering for cover as more than one Torpedo at a time will spell the end for all, save for the Tanks (looking at you, Orisa).
-
Powers
-
Round 1
- Cosmic Coolant – Pulsar Torpedoes’ cooldown is reduced by 1s for each target it hits.
-
Round 3
- Pulsar Plus – Pulsar Torpedoes gains 1 additional charge.
-
Round 5
- Torpedo Glide – During Glide Boost, every 50 damage you deal reduces the cooldown of Pulsar Torpedoes by 1s.
-
Round 7
- Medimaster – Mediblaster can now critically hit both allies and enemies.
-
Round 1
-
Items
- Lock-on Shield
- Boosted Rockets
- Pulstar Destroyers
- Forti-Glide
- Red Promise Regulator
- Champion’s Kit
Overwatch Stadium Kiriko
Kiriko is notorious for her damage and escapability in Overwatch 2. We will add to the damage part, ensuring your teammates do not need to see your Healing Ofuda. In rare occurrences, they need some healing, we have some assistance for them, but we want to focus on our damage threat. We have a perfect gameplay loop to ensure that if we hit our Kunai critical hits, we will not need to reload, and those hits cause explosions.
-
Powers
-
Round 1
- Foxy Fireworks – After reloading, your next 3 thrown [Kunai] explode on contact, dealing 20 damage to nearby enemies.
-
Round 3
- Keen Kunai – Kunai critical hits decrease active ability cooldowns by 15% and refund 3 ammo.
-
Round 5
- Fleet Foot – Swift Step can be used directionally without a target.
-
Round 7
- Triple Threat – After using Swift Step, for 4s, your secondary fire throws 2 additional Kunai in a spread that deals 50% less damage.
-
Round 1
-
Items
- Kitsune Kicks
- Cyclist Gloves
- Farsight Focus Sash
- Talon Modification Module
- El-Sa’Ka Suppressor
- Eye of the Spider
Overwatch Stadium Lucio
Lucio players are the original damage Support, along with Zenyatta. The difference between the Heroes is that Zenyatta is built as a Damage character with some Support capabilities, while Lucio should provide utility for his team. For years, Lucio players have been notorious for their damage-centric behavior, dubbed as Reddit Lucios. With Stadium, we lean further into his damage. The faster we move, the more damage we deal!
-
Powers
-
Round 1
- Fast Forward – While above 50% Move Speed, increase damage by 25%.
-
Round 3
- Signature Shift – After using an ability, your next Sonic Amplifier shot shoots a volley of 6 ammo with a 20% increased projectile size.
-
Round 5
- Let’s Bounce – Soundwave has a 30% increased knockback and deals 40 bonus damage if the target hits a wall.
-
Round 7
- Reverb – Gain 1 extra charge of Soundwave.
-
Round 1
-
Items
- Speed Skates
- Talon Modification Module
- Hip Hop
- Airwaves
- Riff Repeater
- Booster Jets
Overwatch Stadium Mercy
Mercy is the quintessential Support Hero, giving most of her power to her allies through the healing or damage boost. Most of her Stadium Powers and Items build further into her damage boost and healing for her allies. But we do not care about that. We want to become a damage dealer. Unfortunately, we do need to help our allies in some way to reach our highest damage potential.
-
Powers
-
Round 1
- Serenity – Sympathetic Recovery heals for 20% more and heals you even while you are healing a full health ally.
-
Round 3
- Battle Medic – Every 1s your Staff is attached, Caduceus Blaster gains 4% Attack Speed (stacks 10 times) until you reload or swap to your Staff.
-
Round 5
- Renaissance – After successfully using Resurrect, activate Valkyrie for 5s.
-
Round 7
- Crepulscar Circle – While Valkyrie is active, the healing and damage boost of Caduceus Staff is automatically applied to nearby allies.
-
Round 1
-
Items
- Long Distance Wings
- Mid-Air Mobilizer
- Talon Modification Module
- Angelic Acrobatics
- Caduceus Flex
- Celestial Clip
Overwatch Stadium Moira
Anyone who has played a decent amount of Overwatch 2 knows how many damage-focused Moira players there are. Fortunately for Moira players, a couple of build paths allow you to torture your opponents and teammates. For this build specifically, we focus on our damage orbs to deal most of our damage. Our teammates are there to enable our damage capabilities.
-
Powers
-
Round 1
- Chain Grasp – After using Biotic Orb, Biotic Grasp’s secondary fire chains to 2 additional targets within 10m for 3s.
- Chain Grasp – After using Biotic Orb, Biotic Grasp’s secondary fire chains to 2 additional targets within 10m for 3s.
-
Round 3
- Cross Orbal – Biotic Orb launches an additional Biotic Orb of the other type with 50% reduced capacity.
- Cross Orbal – Biotic Orb launches an additional Biotic Orb of the other type with 50% reduced capacity.
-
Round 5
- Multiball – Biotic Orb launches 2 additional orbs of the chosen type with 85% reduced effectiveness.
- Multiball – Biotic Orb launches 2 additional orbs of the chosen type with 85% reduced effectiveness.
-
Round 7
- Deconstruction – After you spend 50 Biotic Energy, deal 20% increased damage for 6s.
- Deconstruction – After you spend 50 Biotic Energy, deal 20% increased damage for 6s.
-
Round 1
-
Items
- Smart Orbs
- Abyss Boots
- Nano Cola
- Extendrils
- Subatomic Splitter
- Champion’s Kit
More must-reads:
- Surprising update emerges about Jayson Tatum's recovery
- Brewers star's injury worse than initially thought
- The '250-strikeout MLB seasons' quiz
Breaking News
Trending News


Customize Your Newsletter
 +
+
Get the latest news and rumors, customized to your favorite sports and teams. Emailed daily. Always free!

PRIVACY POLICY EDITORIAL POLICY CONTACT US
ABOUT YARDBARKER TERMS OF SERVICE
Use of this website (including any and all parts and
components) constitutes your acceptance of these
Terms of Service and Privacy Policy.
This site is for entertainment purposes only.
There is no gambling offered on this site.
Gambling Problem? Call 1-800-Gambler.